Roofing 2026: Installing the Roof Structure and Materials
Roofing is a critical component that protects your entire investment from the elements. Research shows that quality roofing installation can prevent up to 90% of moisture-related building problems and extend the structure’s lifespan by 15-20 years. This comprehensive guide explores professional roofing techniques, material options, and expert strategies to ensure your roof provides decades of protection and value.
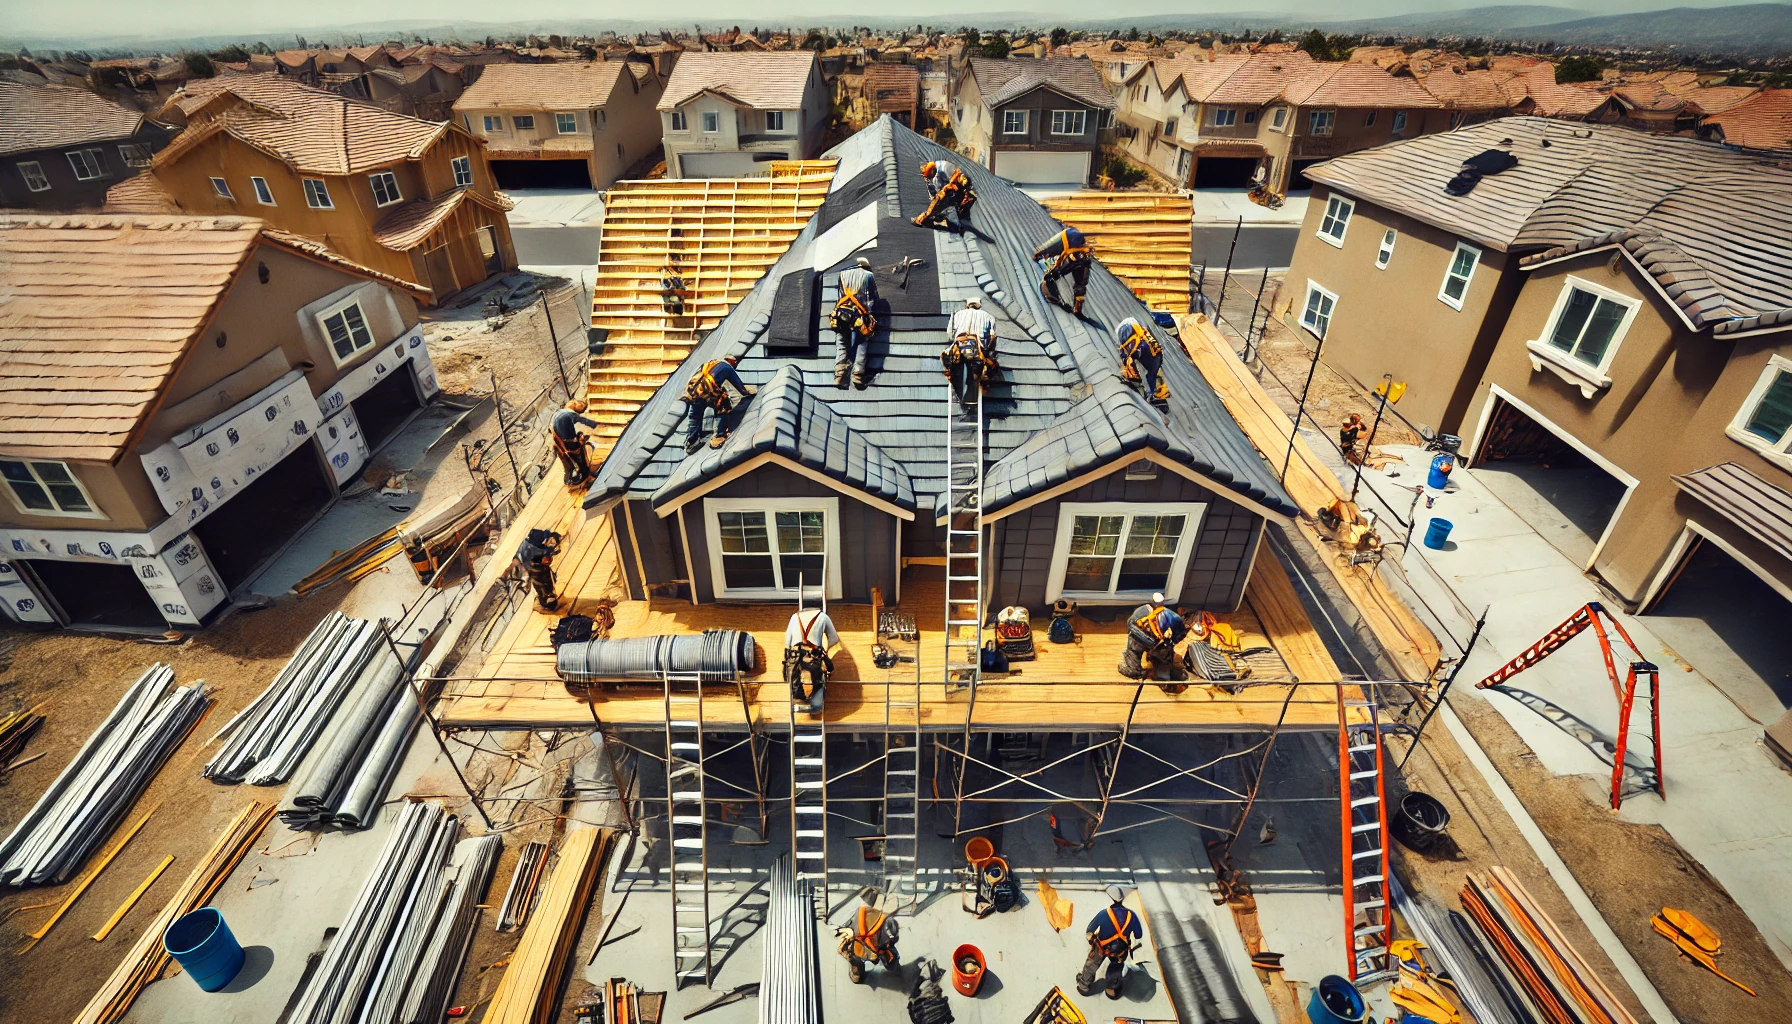
[Image: Professional Roofing Installation in Progress]
⚡ Quick Answers: Roofing Costs, Materials & Common Problems (Click for instant answers)
▼🌍 Critical Roofing Differences in Your Region Wrong roof type = total failure in your climate
▼Key Steps in Roofing Work
These are the critical tasks involved in creating a durable, weatherproof roofing system:
1. Install Roof Decking
Attach wooden or metal sheathing to the roof frame to serve as a stable base for roofing materials. This critical first step creates the structural platform that supports all subsequent roofing components and must be installed with precision.
- Material selection: Use minimum 1/2″ (preferably 5/8″) CDX plywood or 7/16″ OSB rated for roof applications with proper exposure rating
- Fastening pattern: Secure with 8d ring-shank nails at 6″ on center along edges and 12″ on center in field, with nails penetrating rafters by at least 1″
- Panel spacing: Leave 1/8″ gaps between panels to allow for thermal expansion and prevent buckling during temperature changes
2. Install Roofing Underlayment
Apply a protective barrier between the roof decking and the outer roofing materials to prevent moisture infiltration. This secondary water-resistant layer provides crucial protection against leaks, especially during severe weather events.
- Material options: Use 30-pound felt paper (traditional) or synthetic underlayment (more durable, with 2-4 times greater tear resistance)
- Installation method: Apply in horizontal courses starting at the eave, with minimum 4″ side overlaps and 6″ end overlaps working upward toward the ridge
- Ice and water shield: Install self-adhering membrane at eaves (minimum 24″ past exterior wall), valleys, and around penetrations for additional protection
3. Install Roof Flashing
Place metal flashing around roof edges, chimneys, vents, and valleys to direct water away and prevent leaks. Proper flashing is essential for protecting the most vulnerable areas of your roof from water intrusion.
- Material requirements: Use minimum 26-gauge galvanized steel or 0.019″ aluminum flashing with corrosion-resistant coating
- Valley installation: Apply 24″ wide “W” valley flashing with 1/2″ hemmed edges, secured with clips rather than exposed fasteners
- Step flashing: Install individual pieces at wall intersections, with each piece overlapping the previous by 3″ and integrated with siding materials
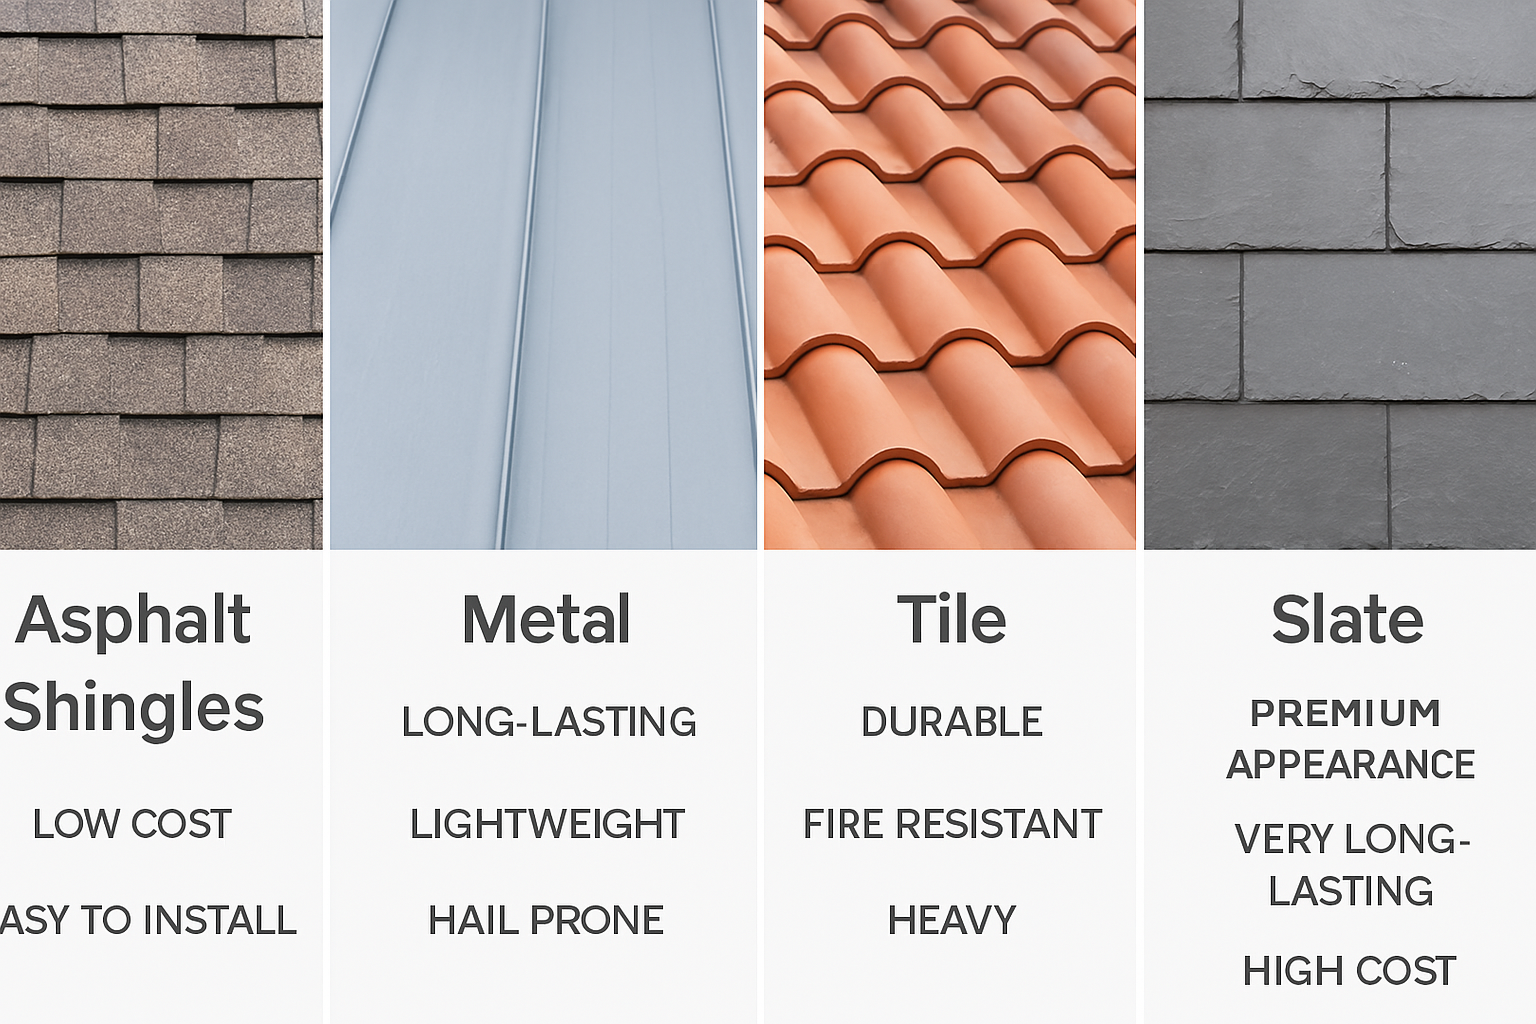
4. Install Roofing Material
Secure shingles, metal panels, tiles, or other roofing materials to create a weather-resistant, finished roof. This visible exterior layer provides both protection and aesthetic appeal while needing to withstand decades of weather exposure.
- Asphalt shingles: Install starter strip at eaves, then overlap courses by 5-6″, with 4-6 nails per shingle placed 1″ above cutouts and 1″ from edges
- Metal roofing: Apply panels with minimum 1.5″ standing seams for low slopes (2:12 to 3:12) or 1″ seams for steeper slopes, with concealed fasteners rated for 100+ mph wind resistance
- Clay/concrete tiles: Install battens 24″ on center for standard tiles, with proper headlaps (3″ minimum) and underlayment reinforced for heavyweight materials
5. Install Roof Ventilation
Incorporate vents to ensure proper attic airflow, reducing moisture buildup and extending the roof’s lifespan. An effective ventilation system prevents premature deterioration of both roofing materials and structural components.
- Ventilation ratio: Provide minimum 1 square foot of net free ventilation area per 150 square feet of attic floor space (1:150 ratio)
- Balanced system: Install equal intake (soffit) and exhaust (ridge/roof) vents to create proper airflow throughout the attic space
- Ridge vent specifications: Use continuous ridge vents with external baffles and minimum 18 square inches of net free area per linear foot
6. Inspection and Clean-Up
Conduct a thorough inspection of the roof installation and clear the site of debris. This final quality control step ensures that all roofing components are properly installed and functioning as intended before the project is completed.
- Inspection points: Verify proper flashing installation, material alignment, ventilation functions, and absence of exposed fasteners or potential leak points
- Water testing: Perform targeted water testing at valley intersections, roof penetrations, and flashing locations to verify weathertightness
- Documentation: Create comprehensive photos and records of installation details for warranty purposes and future reference
Who Handles Roofing Work?
Roofing installation requires various specialized professionals working as a coordinated team:
- Roofing Contractor: Oversees the entire roofing process, manages material selection, and coordinates all aspects of installation while ensuring code compliance
- Sheet Metal Specialist: Fabricates and installs custom flashing, gutters, and metal components that protect vulnerable roof transitions and edges
- Roofing Installers: Skilled technicians who place and secure roofing materials according to manufacturer specifications and industry best practices
- Ventilation Expert: Calculates proper ventilation requirements and installs balanced intake/exhaust systems for optimal attic airflow
- Waterproofing Specialist: Applies underlayment, ice and water shield, and sealing systems that create secondary moisture barriers
- Structural Engineer: Verifies that the roof structure can support the selected roofing material weight and regional snow/wind loads
- Building Inspector: Reviews completed roofing installation to ensure compliance with local building codes and permit requirements
Time & Cost Estimates
The timeline and budget for roofing work vary based on project size, roof complexity, material choices, and regional factors. Here are detailed estimates for each major phase:
| Roofing Component | Estimated Time | Estimated Cost | Key Value Points |
|---|---|---|---|
| Roof Decking | 2–4 days | $2,000–$6,500 | Creates structural base for entire roofing system |
| Underlayment & Water Barriers | 1–2 days | $1,200–$3,800 | Provides secondary protection against water intrusion |
| Flashing Installation | 1–3 days | $800–$2,500 | Protects vulnerable transitions and penetrations |
| Roofing Material Installation | 3–7 days | $4,500–$15,000 | Creates primary weather barrier and aesthetic finish |
| Ventilation System | 1–2 days | $800–$2,800 | Extends roof lifespan by regulating temperature |
| Inspection & Clean-Up | 1–2 days | $400–$1,200 | Ensures quality installation and site restoration |
| Total Estimates | 9–20 days | $9,700–$31,800 | Complete weather protection system with long-term performance |
These cost estimations provide a general guideline and cover a range from basic to mid-tier builds. They may not reflect costs for high-end or luxury projects. For more precise estimates, consult with professionals based on your specific requirements.
Hidden Roofing Costs That Can Double Your Budget
These “surprises” hit 76% of roofing projects—costs your contractor doesn’t mention until you’re halfway through:
The Roofing “Gotcha” List:
| Hidden Cost | Typical Range | Prevention Strategy |
|---|---|---|
| Rotten Decking Can’t see it until shingles off. |
$2,000–$15,000 | Get attic inspection first, look for water stains |
| Code Upgrades “Your ventilation isn’t to current code.” |
$1,500–$5,000 | Check code requirements BEFORE bidding |
| Chimney Repairs Flashing replacement reveals problems. |
$1,000–$8,000 | Get chimney inspection before roofing |
| Disposal Fees Multiple layers = multiple dumpsters. |
$500–$3,000 | Count layers, get disposal in writing |
| Structural Issues Sagging requires reinforcement. |
$3,000–$20,000 | Check attic for sagging before starting |
| Fascia/Soffit Rot Hidden behind gutters. |
$1,500–$6,000 | Inspect during gutter cleaning |
| Permit Complications Inspector wants changes. |
$500–$4,000 | Get permit details in advance |
| Weather Delays Tarping, re-mobilization. |
$500–$5,000 | Schedule in dry season, have tarp plan |
Roofing Disasters: Learn From These Expensive Nightmares
Real roofing catastrophes that destroyed homes and budgets—don’t be the next victim:
💧 The Ice Dam Disaster
Location: Minneapolis, Minnesota | Loss: $85,000 + mold throughout house
Roofer said ventilation was “fine.” First winter: massive ice dams. Water backed up under shingles, through ceiling, down walls. Entire interior gutted for mold remediation. Cause: Blocked soffit vents, no baffles.
- Trusted roofer’s “looks fine” assessment
- No ventilation calculation (needed 1:150 ratio)
- Insulation blocking soffit vents
🌪️ The Storm Chaser Scam
Location: Oklahoma City, Oklahoma | Loss: $45,000 + legal fees
After hailstorm, door-to-door roofer offered “free” roof through insurance. Used cheapest materials, no ice shield, improper nailing. First wind storm: half the roof flew off. Company vanished. Insurance denied claim—unauthorized repairs.
- Hired door-to-door contractor
- No local license verification
- Let contractor “handle” insurance
🔥 The Solar Panel Nightmare
Location: Phoenix, Arizona | Loss: $65,000 + no warranty
Installed solar panels on 5-year-old roof to “save money.” Ten years later, roof leaked everywhere. Had to remove panels ($8k), replace roof ($25k), reinstall panels ($8k), plus water damage. Original roof warranty voided by panel installation.
- Put panels on aging roof
- Didn’t read warranty fine print
- Multiple roof penetrations
📐 The Low-Slope Catastrophe
Location: Seattle, Washington | Loss: $125,000 + structural damage
“Modern” design with 2:12 pitch roof. Contractor used standard shingles. Within 2 years: constant leaks, rot throughout structure. Needed complete tear-off, new decking, proper low-slope system. Architect blamed contractor, contractor blamed architect.
- Shingles on low slope (need 3:12 minimum)
- No low-slope underlayment system
- Designer didn’t understand roofing
Roofing Money-Saving Secrets From 30-Year Veterans
Industry insiders reveal how to cut roofing costs 25-40% without sacrificing quality:
🎯 Timing Your Roof Perfectly
Best Times to Roof (Save 20-35%):
- Late Fall/Early Winter: Contractors hungry before slow season (North)
- After Storm Season: November-December in hurricane zones
- Material Overstock: Year-end when suppliers dump inventory
- Crew Availability: When big commercial jobs end
Real Example: Same 30-square roof: July quote: $18,000 | November quote: $13,500
💰 Material Strategies That Work
| Standard Choice | Smart Alternative | Savings |
|---|---|---|
| Architectural shingles | Last year’s colors | 30-40% off |
| Remove & replace | Overlay (if only 1 layer) | $1,000-3,000 |
| Ridge vent | Box vents (same performance) | $500-1,000 |
| Copper flashing | Painted aluminum | 60-70% less |
🔨 DIY Prep Work (Save $2,000-5,000)
What You CAN Do Yourself:
- Remove Satellite Dishes: And old mounting hardware ($300 savings)
- Clear Attic Access: Move your stuff, create workspace ($500)
- Protect Landscaping: Cover plants, move patio furniture ($200)
- Gutter Removal: If replacing anyway ($500-1,000)
- Cleanup Assistance: Magnetic sweep for nails ($300)
⚠️ NEVER DIY: Any work on the roof, removing old shingles, or structural repairs
🎪 Negotiation Tactics
- “Crew Direct”: Hire foreman’s crew on side job = 30% savings
- “No Warranty”: On rental properties, save 20% (risky but legal)
- “Supply House Account”: Open account, buy materials yourself
- “End of Day”: Let them start at 3pm to finish commercial job
- “Package Deal”: Multiple houses or neighbors = volume discount
⚡ Ultimate Secret: Best roofers are booked 6-8 weeks out. Bad ones available tomorrow. Plan ahead!
Future-Proof Your Roof: Install Once, Upgrade Forever
Smart roofing decisions now save $30,000+ on future additions and technology:
☀️ Solar & Technology Preparation
Install infrastructure NOW for future solar, satellites, and smart home tech:
- Conduit Runs: Install 2″ conduit from roof to electrical panel ($200 now vs $2,000 later)
- Mounting Blocks: Reinforced areas for future solar rails (mark locations)
- Wire Chase: From roof to attic for antennas/weather stations
- Structural Upgrades: Beef up rafters where solar will go (+$500-1,000)
- South-Facing Clear: Keep vents/pipes off prime solar areas
💡 Smart Move: Install solar mounting rails during roofing even if panels come later. Saves penetrating new roof.
🏗️ Planning for Future Additions
| Future Addition | Roof Preparation Now | Cost Now vs Later |
|---|---|---|
| Dormer/Skylight | Frame opening, temporary cover | $500 vs $5,000 |
| Second Story | Tie-in flashing points | $1,000 vs $8,000 |
| Covered Porch | Cricket/diverter ready | $300 vs $3,000 |
| Cupola/Tower | Reinforced decking area | $800 vs $5,000 |
🔧 Upgrade-Ready Infrastructure
- Snow Melt System: Install clips and power runs for future heating cables
- Gutter Heat: Run 12-gauge wire to all downspout locations
- Lightning Protection: Install grounding cables during roofing
- Rainwater Harvesting: First-flush diverters and tank connections
- Green Roof Prep: Extra waterproofing and drainage for future garden
🪜 Permanent Access Solutions
- Roof Anchors: Install OSHA-approved tie-off points ($200 each)
- Cricket Ladder: Permanent ladder on steep roofs for cleaning
- Walkway Pads: For regular traffic areas (HVAC, etc.)
- Access Hatch: From attic for easy inspection
- Security Mounts: For future cameras with sealed penetrations
📸 Document Your Roof System!
Before shingles go on, photograph and map:
- Every penetration location with measurements
- All flashing details and ice shield areas
- Reinforced zones for future installations
- Brand/model of ALL materials used
This documentation saves thousands when adding features or filing warranty claims!
Roofing Cost Calculator: Real Numbers for Every Type
Stop getting shocked by roofing quotes. Here’s what different roofing systems REALLY cost:
Roofing Cost by Material & Size
| Material Type | 1,500 sq ft | 2,000 sq ft | 2,500 sq ft | Lifespan |
|---|---|---|---|---|
| 3-Tab Shingles | $5,500-7,500 | $7,000-10,000 | $9,000-12,500 | 15-20 years |
| Architectural Shingles | $7,500-11,000 | $10,000-15,000 | $12,500-18,500 | 25-30 years |
| Metal (Standing Seam) | $13,500-22,500 | $18,000-30,000 | $22,500-37,500 | 40-70 years |
| Clay/Concrete Tile | $19,500-33,000 | $26,000-44,000 | $32,500-55,000 | 50-100 years |
| Slate | $22,500-45,000 | $30,000-60,000 | $37,500-75,000 | 75-150 years |
Additional Costs to Budget:
- Tear-off Existing: Add $1-3/sq ft ($1,500-4,500)
- Decking Replacement: $2-5/sq ft (assume 20% needs it)
- Ice & Water Shield: $200-500 per valley/eave
- Upgraded Ventilation: $1,000-3,000 total
- Chimney Cricket: $300-800 each
- Steep Pitch (>8:12): Add 20-30% to labor
🔍 Cost Per Square (100 sq ft):
| Basic 3-Tab | $350-500/square |
| Architectural | $450-750/square |
| Premium/Designer | $600-1,000/square |
| Metal Systems | $900-1,500/square |
| Tile/Slate | $1,300-3,000/square |
💡 Total Cost of Ownership:
Don’t just look at install price. Calculate 50-year cost: Metal at $20k lasts 50 years = $400/year. Cheap shingles at $8k last 15 years = $533/year PLUS you re-roof 3 times!
Roofing Q&A: Critical Questions Answered Honestly
The questions every homeowner needs answered (that contractors avoid):
Q: “Can I put new shingles over old ones?”
A: Yes, IF: Only one layer exists, decking is sound, and local code allows. Saves $1-3/sq ft on tear-off. BUT: Can’t inspect/repair decking, adds weight, shortens new shingle life by 20%, and voids many warranties. My take: Only overlay on rentals or if selling soon. Otherwise, tear off and do it right.
Q: “How do I know when to replace vs repair?”
A: Replace if: Roof is 20+ years old, you see daylight through boards, multiple leaks exist, shingles are curling/missing granules, or repair estimate exceeds $3,000. Repair if: Isolated damage from storm, roof under 10 years, single leak source. Rule of thumb: If more than 30% needs work, replace it all.
Q: “What’s the most important part of a roofing system?”
A: FLASHING and VENTILATION tie for first. Perfect shingles mean nothing if flashing leaks or ventilation fails. Ice & water shield is #3—skip it to save $500 and pay $20,000 in water damage. Quality underlayment is #4. The shingles themselves? Actually #5 in importance. A cheap shingle installed perfectly beats expensive shingles installed poorly.
Q: “Is metal roofing worth the extra cost?”
A: YES in these situations: You’ll stay 15+ years, live in high wind/hail areas, want energy savings (25-40% cooling reduction), or hate maintenance. NO if: You’re selling soon, have a complex roof (metal install tricky), or live where it never hails/storms. Standing seam metal done right is bulletproof. Metal shingles are a compromise—skip them.
Q: “What should I never let a roofer do?”
A: NEVER let them: (1) Start without permits, (2) Cover damaged decking without replacing, (3) Reuse old flashing, (4) Skip ice & water shield to save money, (5) Use exposed nails on flashing, (6) Install without written warranty, (7) Take more than 50% payment upfront. Any roofer pushing these is planning to screw you.
Q: “How do I spot a bad roofing contractor?”
A: Red flags: Door-to-door sales, out-of-state plates, “expires today” pricing, no fixed address, wants to “handle your insurance,” asks for cash only, no local references, available immediately (good roofers booked weeks out), dramatically lower price. One red flag = caution. Two or more = RUN. Check license, insurance, and BBB before signing anything.
Best Times to Roof (Save Money, Avoid Problems)
Roof at the right time = lower costs + better installation quality:
| Region | BEST Months | ACCEPTABLE | AVOID | Why It Matters |
|---|---|---|---|---|
| Northern US/Canada | May-Sep | Apr, Oct | Nov-Mar | Shingles brittle in cold, won’t seal |
| Southern US | Oct-Apr | May, Sep | Jun-Aug | Too hot = shingles damage, worker safety |
| Pacific Northwest | Jul-Sep | Jun, Oct | Nov-May | Constant rain = impossible to roof |
| Southwest Desert | Oct-Mar | Apr, Sep | May-Aug | Extreme heat damages materials |
| Midwest | May-Oct | Apr, Nov | Dec-Mar | Snow, ice, wind, temperature swings |
| Hurricane Zones | Nov-May | Oct | Jun-Sep | Hurricane season = disaster |
🌡️ Temperature Rules for Roofing:
- Below 40°F: Shingles crack when nailed, won’t self-seal
- 40-45°F: Hand-sealing required ($500+ extra labor)
- 45-85°F: PERFECT – materials handle well, proper sealing
- 85-95°F: Early morning work only, shingles get soft
- Above 95°F: Stop work – materials damage, heat exhaustion
Money Fact: Off-season roofing saves 20-35% BUT may compromise quality. Balance savings with proper installation!
⛈️ Emergency Roofing Rules
When you CAN’T wait for perfect weather:
- Active Leak: Tarp immediately, temporary patch OK
- Winter Emergency: Use cold-weather shingles + hand seal
- Storm Damage: Document everything, tarp, call insurance FIRST
- Temporary Fix: Roll roofing over damaged area ($200-500)
⚠️ Warning: Emergency repairs cost 50-100% more. Temporary fixes often void warranties. Only for true emergencies!
Cost-Saving Tips
Optimize your roofing investment with these expert strategies:
- Strategic timing: Schedule roofing work during the off-season (typically late fall or winter in many regions) when contractors offer 10-15% discounts due to reduced demand
- Material optimization: Purchase roofing materials in bulk directly from suppliers rather than through contractors, potentially saving 15-20% on material costs
- Architectural efficiency: Design roof with fewer valleys, dormers, and penetrations to reduce complexity and minimize the most leak-prone areas
- Maintenance investment: Allocate budget for professional roof inspections every 2-3 years, which extends roof lifespan by identifying minor issues before they become major problems
- Energy efficiency incentives: Research local utility rebates and tax credits for energy-efficient “cool roof” materials, which can offset 10-30% of premium material costs
- Partial replacement consideration: Evaluate if damaged areas can be selectively repaired rather than replacing the entire roof when addressing isolated problems
Related Construction Guides
Continue your construction journey with these essential guides:
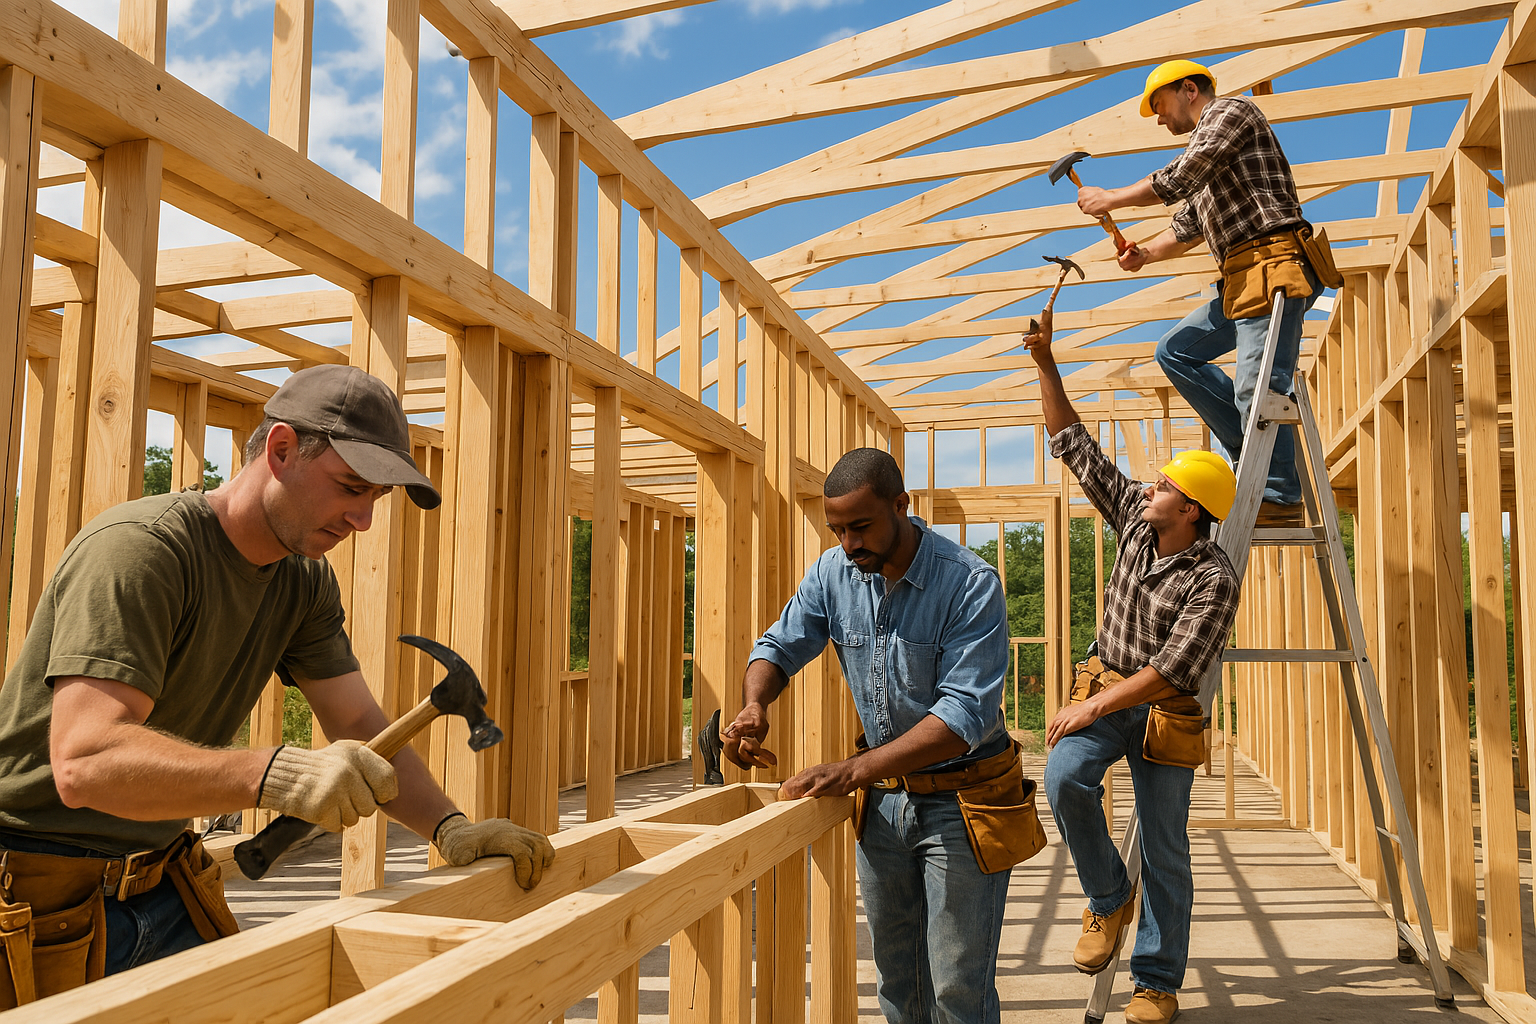
Framing Guide
Must complete before roofing. Proper framing ensures your roof performs correctly.
Read More →Exterior Siding
Coordinate with roofing for proper flashing integration and weather protection.
Read More →Insulation Guide
Proper attic insulation works with roof ventilation for maximum efficiency.
Read More →Interior Finishes
Check for roof leaks before installing expensive interior finishes.
Read More →Find Contractors
Connect with qualified roofing contractors in your area.
Read More →Complete Build Process
See all 10 construction phases from site prep through landscaping.
Read More →Summary: Your Roofing Work Action Plan
1. Prioritize System Integration
Ensure each roofing component—from decking to ventilation—works together as a complete system rather than isolated parts. This integrated approach maximizes performance and prevents premature failures.
2. Invest in Quality Materials
Select appropriate materials based on your climate, roof design, and budget expectations. Remember that higher-quality materials often deliver better long-term value despite higher initial costs.
3. Work With Certified Professionals
Partner with experienced roofing contractors who hold manufacturer certifications, carry proper insurance, and offer robust warranties on both materials and workmanship.
A properly installed roof protects your entire building investment. Following these professional guidelines ensures your roofing system will provide decades of reliable performance while maintaining its aesthetic appeal and structural integrity.
Complete Your Roofing Project With Confidence
Track Your Progress: Monitor your roofing milestones with our interactive tools
Stay Notified: Receive alerts for material deliveries, weather forecasts, and inspection schedules
Step-by-Step Guidance: Follow detailed instructions on underlayment, flashing, material installation, and ventilation
Reduce Stress: Keep all roofing specifications and warranty information organized in one secure location
Whether you’re building a new structure or replacing an existing roof, proper installation is essential for long-term protection and performance. Explore our Step-by-Step Builds, Step-by-Step Buys, and Step-by-Step Invest resources for more expert guidance.
When building your own home, always do your due diligence. Consult the professionals you’ve hired—such as your architect, subcontractors, or engineers—and confirm that your work complies with all local building codes and inspections required in your country, state, or province. Builds and Buys is for educational purposes only. Always verify with licensed professionals.
How to Build a Roof
In this video, Mat Woodyatt, Training Manager at Redland Roofing demonstrates how to put together a full metric roofing system. Follow onscreen instructions to skip to selected chapters
Check out more informative Videos

Knowledge Quiz: Roofing
Open Quiz
5 quick questions - see how much you learned!
1) According to the guide, quality roofing installation can prevent what percentage of moisture-related building problems?
Answer: A
The introduction states that "Research shows that quality roofing installation can prevent up to 90% of moisture-related building problems and extend the structure's lifespan by 15-20 years."
2) What is the required ventilation ratio for attic floor space according to the guide?
Answer: C
The "Install Roof Ventilation" section specifies "Provide minimum 1 square foot of net free ventilation area per 150 square feet of attic floor space (1:150 ratio)."
3) How far past the exterior wall should ice and water shield extend at the eaves?
Answer: D
The "Install Roofing Underlayment" section states: "Install self-adhering membrane at eaves (minimum 24″ past exterior wall), valleys, and around penetrations for additional protection."
4) What contingency percentage does the guide recommend budgeting for roofing projects?
Answer: B
The "Hidden Roofing Costs" section includes the SMART MOVE tip: "Budget 40% contingency for roofing. Always assume 20% decking replacement."
5) What is the minimum recommended thickness for CDX plywood roof decking?
Answer: A
The "Install Roof Decking" section specifies "Use minimum 1/2″ (preferably 5/8″) CDX plywood or 7/16″ OSB rated for roof applications."
News And Knowledge
Stay informed with the latest trends, insights, and updates in the real estate world.