HVAC Installation 2026: Proper Heating, Ventilation, and Air Conditioning
HVAC systems are the core climate control infrastructure that determines comfort, air quality, and energy efficiency. Research shows that proper installation can improve system efficiency by 30% and extend equipment lifespan by 5-10 years. This comprehensive guide explores professional installation techniques, equipment selection, and expert strategies to ensure your HVAC system delivers optimal performance and value.
[Image: Professional HVAC System Installation in Progress]
⚡ Quick Answers: HVAC Costs, Sizing & Common Mistakes (Click for instant answers)
▼📍 Global HVAC Requirements for Your Region Critical differences in equipment and installation
▼Key Steps in HVAC Installation
These are the critical tasks involved in creating an efficient, properly sized HVAC system:
1. System Design and Load Calculation
Map out the HVAC system layout and select equipment tailored to the building’s specific requirements. This critical planning phase ensures proper system sizing and efficiency for your unique space and climate conditions.
- Heat load calculation: Perform Manual J calculation (ACCA approved method) accounting for square footage, insulation values (R-factors), window specifications, and local climate data
- Equipment sizing: Size units based on BTU requirements (typically 20-25 BTU per square foot for heating in moderate climates) with no more than 15% oversizing to prevent short-cycling
- Zoning considerations: Design separate zones for multi-level homes or areas with different exposure/usage patterns, with dedicated thermostats and damper systems
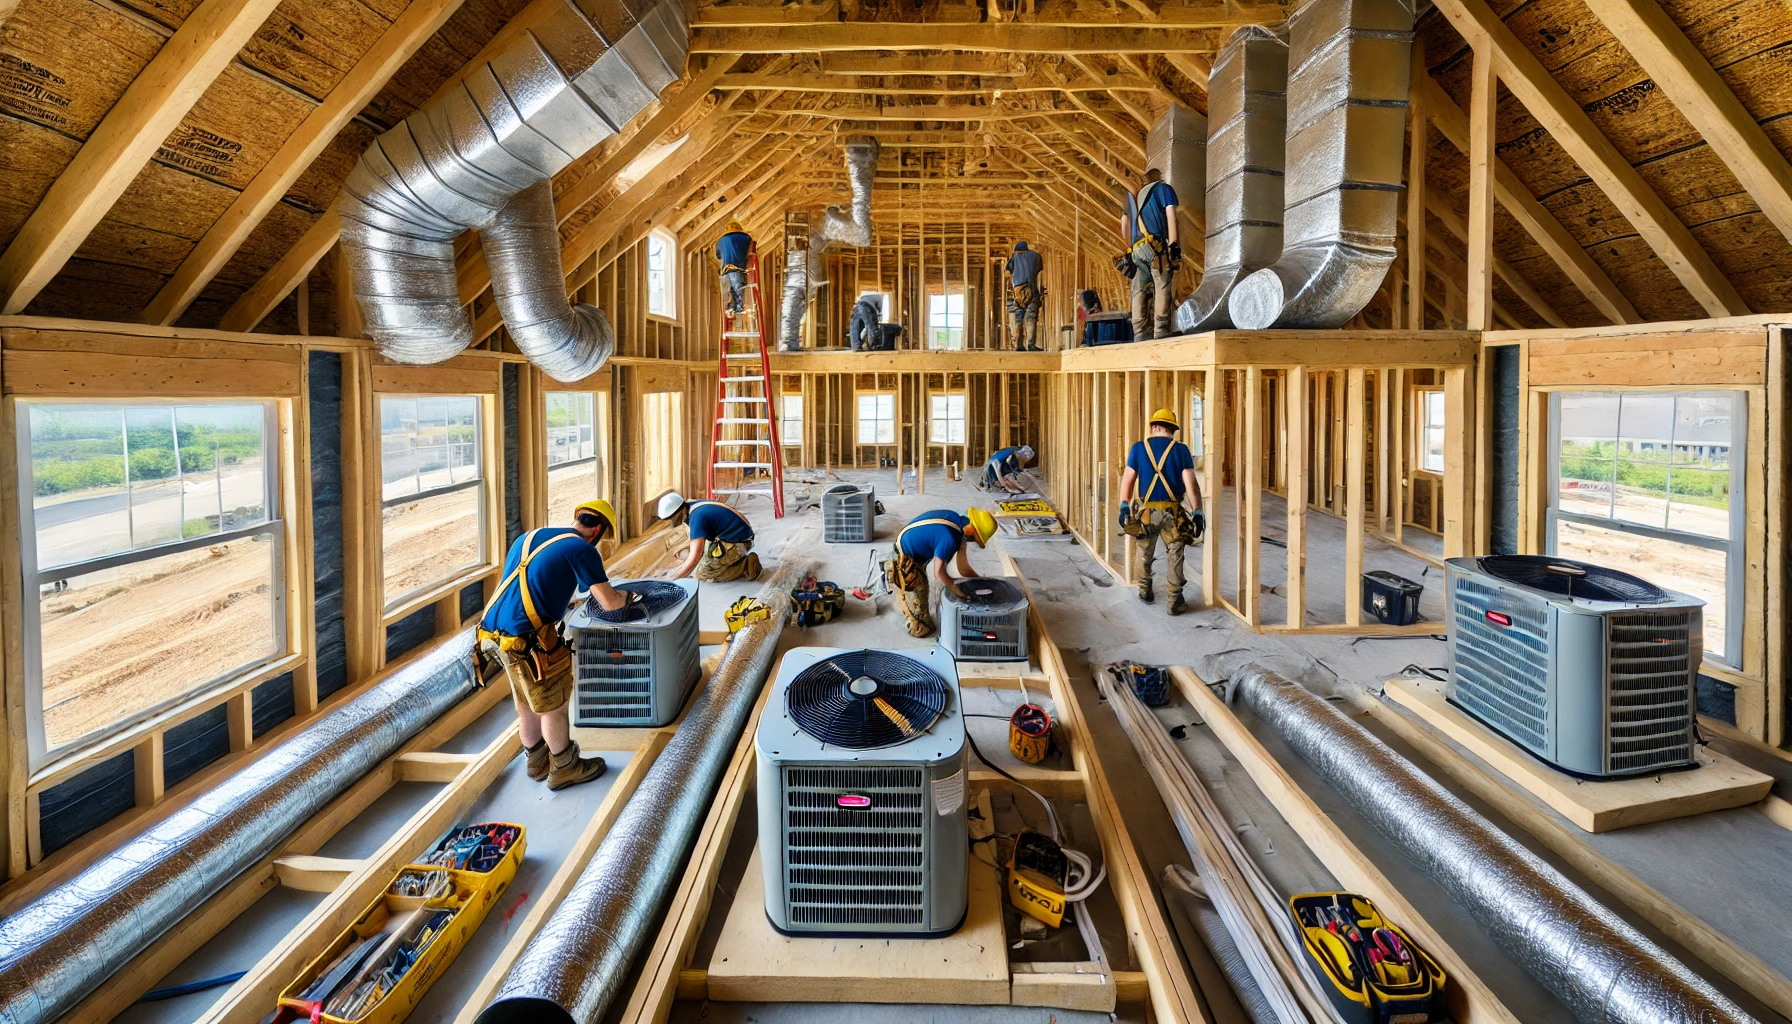
2. Ductwork Design and Installation
Install properly sized and sealed ducts to ensure efficient distribution of conditioned air throughout the space. The ductwork system is the delivery network for your HVAC system and must be designed for minimal pressure loss and leakage.
- Duct sizing: Calculate using Manual D methodology with velocity limits of 700-900 FPM for supply trunks and 500-700 FPM for branch ducts to minimize noise and pressure loss
- Material selection: Use minimum 26-gauge galvanized steel for main trunks, insulated flexible ducts (R-8 in unconditioned spaces) for branch runs, with maximum flex duct length of 14′
- Sealing methods: Seal all duct seams with mastic (not duct tape), achieving maximum 6% leakage in supply ducts and 4% in return ducts under testing at 25 Pa pressure
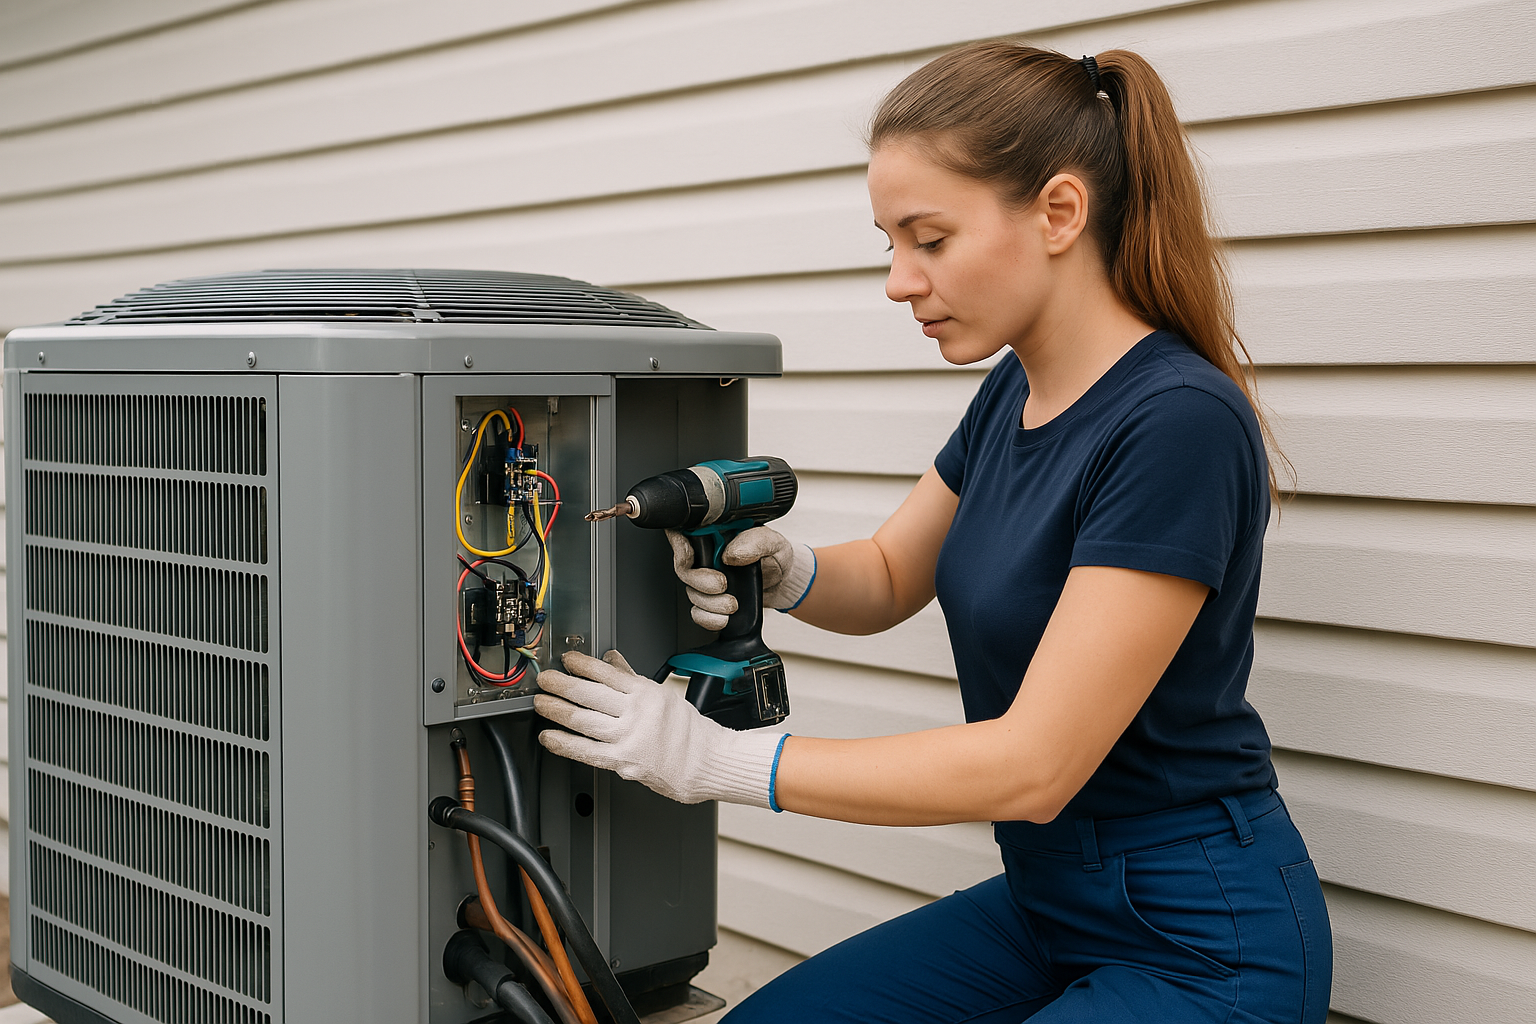
3. Equipment Installation
Set up the primary heating and cooling units, ensuring proper connections to ducts, power sources, and fuel lines. This phase establishes the core mechanical components of your climate control system.
- Unit placement: Position outdoor condensers with minimum 24″ clearance on three sides, 60″ service side clearance, on level pads elevated 3″ above grade with proper slope for drainage
- Line set installation: Install refrigerant lines with proper sizing (typically 3/8″ liquid line, 3/4″-7/8″ suction line), maximum 50′ length, insulated fully with minimum 3/8″ wall thickness
- Condensate management: Install primary and secondary drain lines (3/4″ PVC) with minimum 1/4″ per foot slope, P-traps at air handlers, and safety switches to shut down system if drains clog
4. Ventilation System Integration
Incorporate proper ventilation systems to ensure adequate fresh air exchange and maintain indoor air quality. Modern energy-efficient homes require dedicated ventilation to prevent stale air and moisture problems.
- Fresh air requirements: Provide minimum 0.35 air changes per hour or 15 CFM per person according to ASHRAE 62.2 standards for residential applications
- ERV/HRV installation: Install energy or heat recovery ventilators in tightly sealed homes to exchange air while recovering up to 80% of heating/cooling energy
- Exhaust ventilation: Connect bathroom fans (minimum 50 CFM) and kitchen hoods (minimum 100 CFM) to dedicated ductwork venting directly outdoors with backdraft dampers
5. Control System Setup
Install and program thermostats and control systems to enable precise temperature management and system operation. Modern controls are the interface between users and the HVAC system, offering both comfort and efficiency benefits.
- Thermostat placement: Install on interior walls away from heat sources, supply registers, and direct sunlight at 48″-52″ above finished floor
- Wiring specifications: Use minimum 18-gauge wire for thermostats with dedicated wire bundles for each zone controller, properly color-coded for trouble-free service
- Programming options: Configure setback schedules (typically 7°-10°F for heating, 4°-7°F for cooling during unoccupied periods) to optimize energy usage patterns
6. System Balancing and Commissioning
Adjust and balance the system to achieve even airflow and consistent temperature distribution throughout all spaces. Proper commissioning ensures the system operates as designed and delivers the expected comfort and efficiency.
- Airflow verification: Measure and adjust supply registers to within 10% of design values using flow hood or anemometer, achieving minimum 400 CFM per ton of cooling
- Refrigerant charge: Verify proper refrigerant charge using subcooling method (10°-12°F typical target) or superheat method (8°-12°F typical) depending on metering device
- System startup sequence: Follow manufacturer-specific procedures for initial startup, including verification of safety controls, proper fuel pressure for combustion units, and thermostat operation
Who Handles HVAC Installation?
HVAC installation requires specialized professionals with proper training, certification, and experience:
- HVAC Design Engineer: Performs load calculations, system sizing, and creates detailed specifications based on building characteristics and local climate conditions
- NATE-Certified Technicians: Skilled professionals with North American Technician Excellence certification who install equipment according to manufacturer specifications and industry best practices
- Sheet Metal Specialists: Fabricate and install custom ductwork, ensuring proper sizing, minimal leakage, and efficient airflow throughout the distribution system
- Licensed Refrigeration Technicians: Handle refrigerant management, including system evacuation, charging, and leak testing in compliance with EPA regulations
- Controls Specialists: Install and program thermostats, zoning systems, and advanced control interfaces for optimal system performance
- Mechanical Inspector: Verifies that all installations meet local building codes and safety requirements before system operation
- Commissioning Agent: Performs comprehensive testing to ensure the system operates according to design specifications and provides documentation of performance metrics
Time & Cost Estimates
The timeline and budget for HVAC installation vary based on system complexity, building size, and equipment quality. Here are detailed estimates for each major phase:
| HVAC Component | Estimated Time | Estimated Cost | Key Value Points |
|---|---|---|---|
| System Design & Load Calculation | 1–2 days | $1,200–$3,500 | Ensures proper sizing and prevents costly oversizing/undersizing |
| Ductwork Installation | 2–4 days | $2,500–$6,800 | Creates efficient air distribution network with minimal losses |
| Equipment Installation | 1–3 days | $3,200–$12,000 | Provides core heating/cooling capacity with proper connections |
| Ventilation Integration | 1–2 days | $1,500–$4,500 | Ensures proper fresh air exchange and moisture control |
| Control System Setup | 0.5–1 day | $400–$2,200 | Enables precise temperature management and programming |
| Balancing & Commissioning | 1–2 days | $800–$2,500 | Verifies proper operation and optimizes performance |
| Total Estimates | 6.5–14 days | $9,600–$31,500 | Complete climate control system with efficiency and comfort |
These cost estimations provide a general guideline and cover a range from basic to mid-tier builds. They may not reflect costs for high-end or luxury projects. For more precise estimates, consult with professionals based on your specific requirements.
Hidden HVAC Costs That Destroy Your Budget
These sneaky expenses hit 76% of HVAC installations—contractors “forget” to mention them:
The “That’ll Be Extra” Cost List:
| Hidden Cost | Typical Range | How to Avoid/Minimize |
|---|---|---|
| Electrical Panel Upgrade “Your panel can’t handle the new AC load.” |
$2,000–$4,500 | Check panel capacity BEFORE getting quotes. Need 30-60 amps free |
| Ductwork Replacement “Your ducts are undersized/leaking/damaged.” |
$3,000–$8,000 | Get duct inspection first ($200). Often can seal vs replace |
| Concrete Pad Pour Old pad cracked or wrong size for new unit. |
$500–$1,500 | Measure existing pad. New units often bigger than old |
| Refrigerant Line Set “Can’t reuse old lines with new refrigerant.” |
$800–$2,500 | R-410A requires new lines. Ask upfront if included |
| Permits & Inspections City requires multiple inspections. |
$400–$1,200 | Call building dept yourself. Know requirements |
| Thermostat Rewiring “Need to run new 5-wire for smart thermostat.” |
$300–$800 | Check existing wiring (need C-wire for smart stats) |
| Code Upgrades “New code requires disconnect/surge protector.” |
$500–$1,500 | Research current codes before quotes |
| Disposal Fees Old equipment and refrigerant disposal. |
$200–$600 | Clarify if removal included. Scrap value offsets cost |
| Crane/Lift Rental Rooftop units or tight access. |
$800–$2,500 | Mention access issues upfront for accurate quotes |
| Weekend/Emergency Rates “You need AC today? That’s overtime.” |
+50–100% labor | Plan ahead. Use portable units while waiting |
HVAC Disasters: Real Horror Stories & Expensive Lessons
Learn from these catastrophic HVAC failures—actual insurance claims and lawsuits:
⚠️ The $89,000 Mold Nightmare
Location: Atlanta, Georgia | Loss: $89,000 + health issues
Contractor installed 5-ton AC for 3-ton needs. Oversized unit short-cycled, never removed humidity. Within 6 months: black mold throughout house. Family developed respiratory issues. Insurance denied claim (improper installation). Lost lawsuit against contractor (he disappeared).
- No Manual J calculation (guessed size)
- Ignored humidity considerations
- “Bigger is better” mentality
- No commissioning/testing
⚠️ The Carbon Monoxide Near-Tragedy
Location: Chicago, Illinois | Loss: $125,000 + criminal charges
Handyman installed furnace with improper venting. Exhaust leaked into home. Family of 5 hospitalized with CO poisoning on Christmas Eve. Permanent neurological damage to 8-year-old. Installer charged with criminal negligence.
- Used single-wall vent (code requires double)
- Negative slope on exhaust pipe
- No CO detectors installed
- Unlicensed installer to save $1,000
⚠️ The Ductwork Collapse Disaster
Location: Phoenix, Arizona | Loss: $47,000 complete redo
Flex duct installed in 140°F attic with no support. Inner liner collapsed after 18 months. Zero airflow to bedrooms. System ran 24/7 trying to cool. $800/month electric bills. Complete duct replacement required.
- Flex duct runs over 15 feet
- No support every 4 feet
- Sharp bends (90° turns)
- Cheap thin flex in extreme heat
⚠️ The Refrigerant Fire Bomb
Location: Houston, Texas | Loss: $275,000 house fire
Technician mixed R-22 and R-410A refrigerants. System ran extreme pressures. Compressor exploded, ignited oil, burned down garage and half of house. Tech had no insurance. Homeowner sued but got nothing.
- Mixed incompatible refrigerants
- No pressure testing
- Ignored high pressure warnings
- Unlicensed tech from Craigslist
HVAC Money-Saving Secrets From 30-Year Contractors
Legitimate ways to cut costs without sacrificing comfort or safety:
🎯 Timing Your Installation (Save 20-40%)
Best Installation Times:
- October-November: Post-cooling season = 30% discounts
- March-April: Pre-cooling rush = contractors hungry
- Manufacturer Rebate Seasons: Usually March & September
- End of Month/Quarter: Sales quotas = better deals
Real Example: Same 3-ton Carrier system: July quote: $8,500 | November quote: $6,200 | With rebates: $5,400
💰 Equipment Selection Strategies
- Last Year’s Models: Save 30-40% on identical performance
- Single-Stage vs Variable: 16 SEER single often better value than 18 SEER variable
- Package Units: All-in-one systems 20% cheaper than split systems
- Heat Pump vs AC+Furnace: Heat pumps cheaper in mild climates
- Brand Flexibility: Carrier/Bryant/Payne = same unit, different badge
🔨 Installation Cost Cutters
| Strategy | Typical Savings |
|---|---|
| Keep existing ductwork (seal/insulate instead) | $2,000-5,000 |
| Reuse concrete pad and electrical disconnect | $500-1,200 |
| Standard location (not attic/crawlspace) | $800-2,000 |
| Buy during group purchase (3+ neighbors) | 15-25% each |
| Skip extended warranties (self-insure) | $800-1,500 |
🎪 Efficiency vs Price Sweet Spots
Best Bang for Buck (10-year analysis):
- Cooling: 16 SEER beats 20 SEER unless electric > $0.15/kWh
- Heating: 96% AFUE furnace optimal (98% not worth extra $)
- Heat Pump: HSPF 9.5 is sweet spot for most climates
- Don’t Overpay For: WiFi stats ($300), UV lights ($600), electrostatic filters ($400)
📋 Negotiation Power Phrases
“What’s your cash price if I pay upon completion?”
→ 5-8% discount typical
“I’m getting 3 more quotes this week. Why should I choose you?”
→ Forces value proposition, not just price
“If I sign today, what can you do on price?”
→ Only say if you’re ready to commit
“What if I handle the permit and disposal myself?”
→ Saves $400-800 if you have time
Future-Proof Your HVAC: Smart Investments Now, Big Savings Later
Install infrastructure today for tomorrow’s technology and needs:
🏠 Smart HVAC Infrastructure
Install NOW for $200-500 | Retrofit LATER for $1,000-2,500
- 8-Wire Thermostat Cable: Run now even if using 5-wire stat
- Zoning Dampers: Install motorized dampers, activate later
- Variable Speed Ready: Size electrical for future VS upgrades
- Communication Wiring: RS-485 for future equipment integration
- Sensor Locations: Pre-wire for room sensors and IAQ monitors
💡 Smart Move: Install duct-mounted dampers now ($150 each), add zone control later ($800)
⚡ Solar & Geothermal Ready
| Future System | Prep Now | Cost Now vs Later |
|---|---|---|
| Solar HVAC | DC-compatible air handler wiring | $300 vs $1,500 |
| Geothermal | Loop field conduit stubs | $500 vs $2,000 |
| Dual Fuel | Gas line to heat pump location | $400 vs $1,200 |
| Battery Backup | Transfer switch wiring | $200 vs $800 |
💨 Advanced Air Quality Prep
- UV Light Wiring: Install 120V circuit in air handler ($100)
- Humidifier Plumbing: Water line and drain to furnace ($200)
- ERV/HRV Ducts: Install penetrations and rough ducts ($400)
- MERV-16 Cabinet: Space for 4″ filters vs standard 1″ ($300)
- CO2 Sensor Wiring: For demand-controlled ventilation ($150)
🏗️ System Expansion Readiness
Size infrastructure for future additions:
- Ductwork: Size main trunk for 20% extra capacity ($200)
- Electrical: Run 60A circuit even if unit needs 30A ($150)
- Refrigerant Lines: Install larger line set sleeves ($100)
- Condensate: Oversized drains for future capacity ($50)
- Return Air: Frame for second return grille location ($150)
⚠️ Critical Documentation!
Create HVAC system manual with:
- All model/serial numbers (photo of data plates)
- Duct layout diagram with CFM at each register
- Refrigerant charge records and pressures
- Filter sizes and MERV ratings for each location
- Warranty documentation and installer contact
This documentation adds $5,000+ to resale value!
HVAC Cost Calculator: Real Numbers by System Type & Size
Get accurate budget estimates based on your specific needs:
Complete System Installation Costs
| Home Size | Basic (14 SEER/80%) |
Standard (16 SEER/95%) |
Premium (20+ SEER/98%) |
|---|---|---|---|
| 1,000-1,500 sq ft 2-2.5 ton AC |
AC: $3,500-4,500 Furnace: $2,500-3,500 Total: $6,000-8,000 |
AC: $4,500-6,000 Furnace: $3,500-4,500 Total: $8,000-10,500 |
AC: $6,000-8,500 Furnace: $4,500-6,000 Total: $10,500-14,500 |
| 1,500-2,500 sq ft 3-4 ton AC |
AC: $4,000-5,500 Furnace: $3,000-4,000 Total: $7,000-9,500 |
AC: $5,500-7,500 Furnace: $4,000-5,500 Total: $9,500-13,000 |
AC: $7,500-10,000 Furnace: $5,500-7,000 Total: $13,000-17,000 |
| 2,500-3,500 sq ft 4-5 ton AC |
AC: $5,000-7,000 Furnace: $3,500-4,500 Total: $8,500-11,500 |
AC: $7,000-9,000 Furnace: $4,500-6,000 Total: $11,500-15,000 |
AC: $9,000-12,500 Furnace: $6,000-8,000 Total: $15,000-20,500 |
| 3,500+ sq ft 5+ ton/Dual units |
Systems: $10,000-14,000 With dual zones: $16,000-22,000 |
Systems: $14,000-18,000 With dual zones: $22,000-28,000 |
Systems: $18,000-25,000 With dual zones: $28,000-38,000 |
Additional Cost Factors:
- Heat Pump Instead: Add 15-20% to AC-only price
- Ductwork Replacement: Add $3,000-8,000
- Zoning System: Add $2,000-4,000 per zone
- Attic/Crawlspace Install: Add 20-30% labor
- Smart Thermostat: Add $200-500 installed
- 10-Year Labor Warranty: Add $800-1,500
💡 Component Breakdown:
- Condenser unit: $1,500-4,000
- Air handler: $1,200-3,000
- Furnace: $1,000-3,500
- Thermostat: $150-500
- Labor: $2,000-5,000
- Materials: $500-1,500
- Permits: $200-800
- Disposal: $200-500
HVAC Q&A: Your Burning Questions Answered
The questions every homeowner asks (but contractors dodge):
Q: “Should I repair my 12-year-old AC or replace it?”
A: Follow the $5,000 rule: Multiply repair cost by age of unit. If over $5,000, replace. Example: $600 repair × 12 years = $7,200 (REPLACE). Also consider: R-22 units must be replaced (refrigerant costs $150/lb). Units over 10 years are 50% less efficient than new ones. If facing $1,500+ repair on 10+ year unit, replacement saves money within 3 years.
Q: “What SEER rating should I buy?”
A: Depends on runtime. Hot climates (AZ, TX, FL): 18+ SEER pays off in 5-7 years. Moderate climates: 16 SEER is sweet spot. Cold climates: 14-16 SEER sufficient. Math: Every 2 SEER points = 13% energy savings. If AC costs $2,000/year to run, 20 SEER saves $520/year over 14 SEER. Don’t overpay for 23+ SEER unless running 9+ months/year.
Q: “Is duct cleaning worth $400?”
A: Usually NO. EPA says unnecessary unless: visible mold, vermin infestation, or excessive dust blowing out. Most “$99 whole house” deals are scams – they upsell to $800+. If needed, expect $400-600 for proper job with HEPA vacuum and brush system. Better investment: seal duct leaks ($300) which saves 20-30% on bills.
Q: “Heat pump or gas furnace for heating?”
A: Calculate the “balance point.” If electric costs less than 3x natural gas price per BTU, heat pump wins. Most US regions: heat pump cheaper above 25°F, gas below. Dual fuel system ideal but adds $1,500. New cold-climate heat pumps work to -15°F. If no gas available, heat pump beats propane/oil by 50%+.
Q: “Why do quotes vary by $5,000 for same equipment?”
A: Installation quality varies wildly. Cheap quote likely skips: proper sizing calculation ($500 value), new refrigerant lines ($800), concrete pad ($400), proper drainage ($200), commissioning ($500), permit ($300). Ask: “Does quote include Manual J calculation, new line set, and commissioning report?” If no, find another contractor.
Q: “Do I really need a maintenance contract?”
A: For years 1-2: NO (under warranty). Years 3-10: MAYBE ($150-200/year reasonable). After 10 years: YES (prevents major failures). Good contract includes: 2 tune-ups, refrigerant top-off, 20% repair discount, priority service. Bad contracts: just change filter and check thermostat. DIY maintenance saves $100/year if you’re handy.
Best Time for HVAC Installation (Weather, Pricing & Availability)
Strategic timing saves money AND ensures better installation quality:
| Region | BEST Months (Save 20-40%) |
OK Months (Normal Price) |
AVOID (Premium + Wait) |
Why Timing Matters |
|---|---|---|---|---|
| Northeast US | Oct-Nov, Mar-Apr | Sep, May | Dec-Feb, Jun-Aug | Extreme temps = emergency calls only, 2-week waits |
| Southeast US | Nov-Feb | Mar, Oct | Apr-Sep | AC failures peak May-Sept = 3-week waits |
| Southwest US | Nov-Mar | Apr, Oct | May-Sep | 115°F+ makes rooftop work dangerous/impossible |
| Midwest US | Apr-May, Sep-Oct | Mar, Nov | Dec-Feb, Jun-Aug | -20°F to 95°F extremes = equipment can’t be installed |
| Pacific NW | May-Sep | Apr, Oct | Nov-Mar | Rain makes roof/outdoor work miserable |
| Mountain West | May-Jun, Sep-Oct | Jul-Aug | Nov-Apr | Snow/ice prevents safe installation |
🌡️ Installation Temperature Requirements:
- Refrigerant Charging: Outdoor temp must be 55°F-95°F for accurate charge
- Brazing/Soldering: Cannot be done in rain or high winds
- Condensate Testing: Above freezing to verify drainage
- Heat Testing: Below 70°F outdoor for proper setup
- Worker Safety: OSHA limits work above 95°F or below 0°F
- End of Month = Sales quotas = 10-15% discounts
- Manufacturer rebates peak in March & October
- December installations = 30% off (contractors desperate)
- Never install in July unless AC died (50% price premium)
Cost-Saving Tips
Optimize your HVAC investment with these expert strategies:
- Equipment efficiency selection: Choose high-efficiency units (minimum 16 SEER for cooling, 95% AFUE for heating) that qualify for utility rebates and tax incentives, often offsetting 10-30% of installation costs
- Duct optimization: Design compact duct layouts with minimal bends and transitions, reducing both material costs and long-term operating expenses by improving system efficiency by 10-15%
- Multi-stage equipment: Consider two-stage or variable capacity systems that may cost 15-20% more initially but can reduce energy consumption by 25-35% over single-stage units
- Zoning implementation: Install zoning systems that allow independent control of different areas, reducing energy usage by up to 30% by conditioning only occupied spaces
- Seasonal timing: Schedule installations during off-peak seasons (typically spring or fall) when HVAC contractors offer promotional pricing and have greater availability
- Preventive accessibility: Ensure easy access to components requiring regular maintenance, reducing long-term service costs by 15-20% over the system’s lifespan
Related HVAC & Building System Guides
Continue your project with these essential guides:
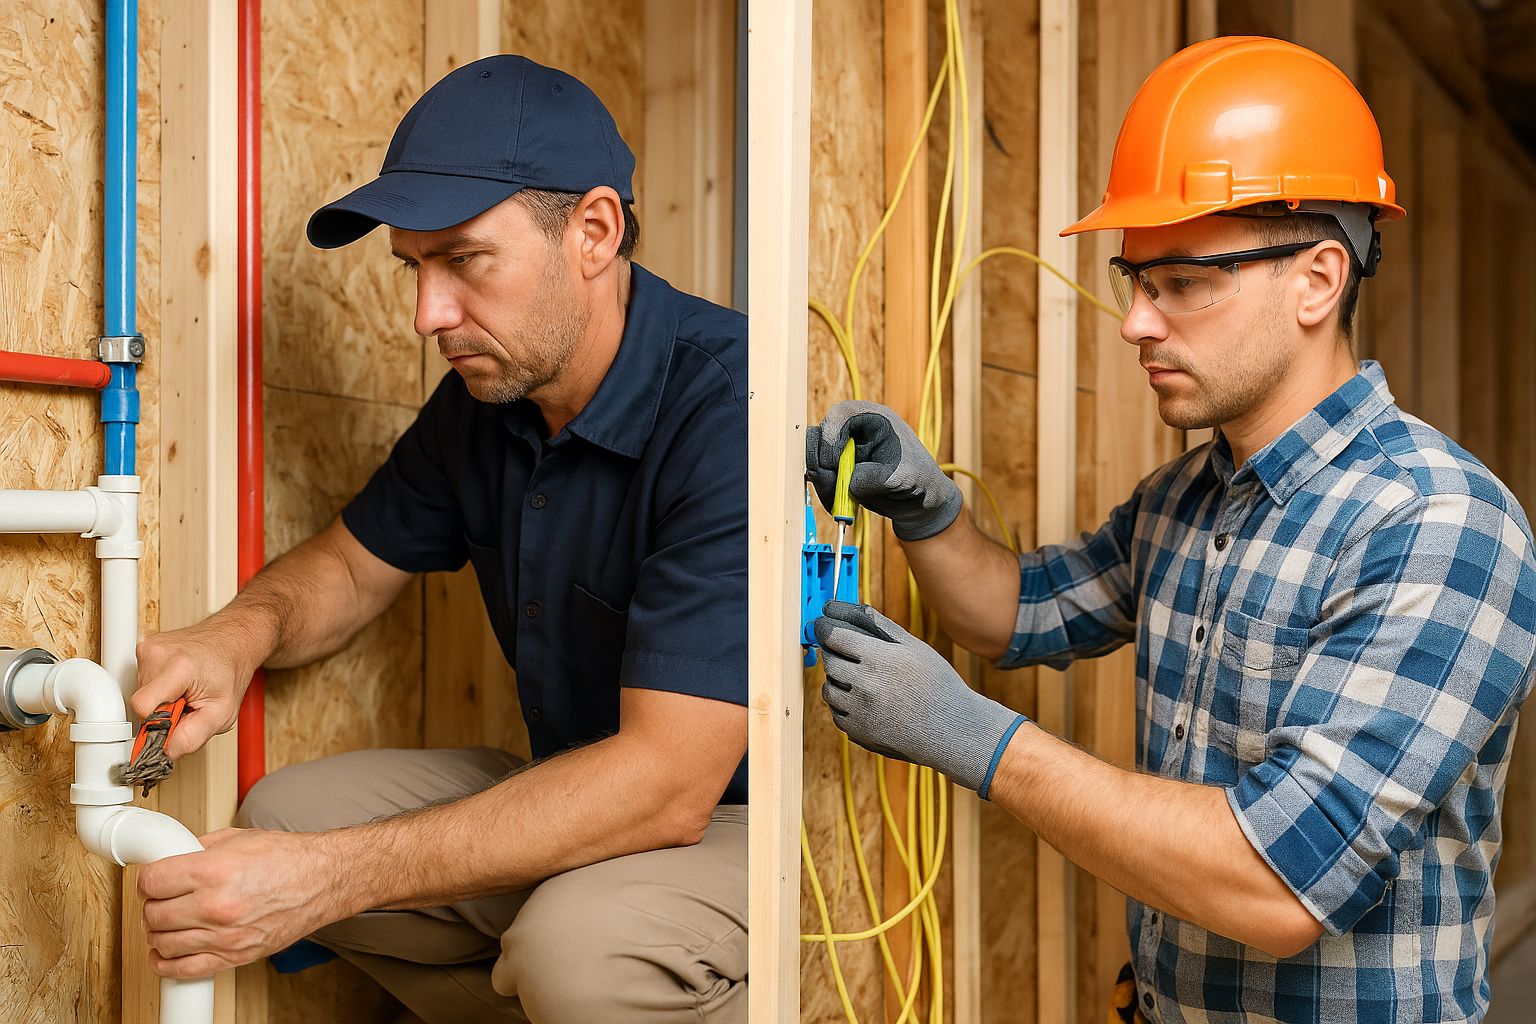
Plumbing & Electrical
Must be completed before HVAC. Understand the coordination needed.
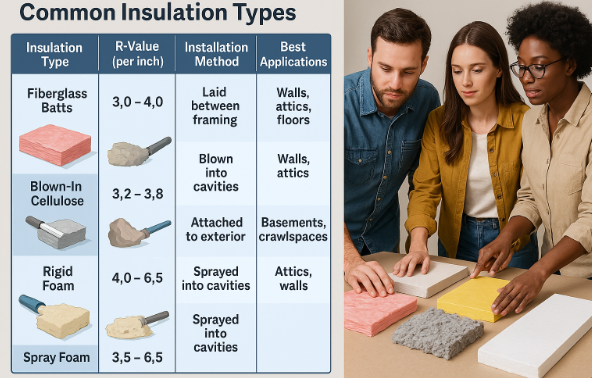
Read More →Insulation & Drywall
Critical for HVAC efficiency. Proper insulation saves 30% on bills.
Read More →Find HVAC Contractor
How to vet and hire the RIGHT HVAC installer. Critical reading.
Read More →Framing Guide
Framing affects duct runs and equipment placement. Plan ahead.
Read More →Interior Finishing
How to integrate vents and returns aesthetically. Design matters.
Read More →Complete Build Process
See where HVAC fits in the overall construction sequence.
Read More →Summary: Your HVAC Installation Action Plan
1. Prioritize Proper System Design
Invest in professional load calculations and system design to ensure your HVAC equipment is properly sized for your specific building. This prevents both performance issues and excessive energy consumption while extending equipment life.
2. Focus on Distribution Quality
Ensure ductwork is properly sized, sealed, and insulated as this often-overlooked component can reduce system efficiency by up to 30% if poorly executed. Quality distribution systems deliver comfort to every space while minimizing energy losses.
3. Verify Performance Through Commissioning
Require comprehensive testing and balancing of the completed system to confirm it operates according to design specifications. This final quality control step ensures you receive the comfort, efficiency, and reliability you’ve invested in.
A properly installed HVAC system is essential for comfort, efficiency, and indoor air quality. Following these professional guidelines ensures your climate control system will provide years of reliable performance while minimizing operating costs.
Complete Your HVAC Project With Confidence
Track Your Progress: Monitor your HVAC installation milestones with our interactive tools
Stay Notified: Receive alerts for equipment deliveries, inspection schedules, and commissioning tests
Step-by-Step Guidance: Follow detailed instructions on system design, equipment selection, and installation verification
Reduce Stress: Keep all HVAC specifications and warranty information organized in one secure location
Whether you’re installing a new HVAC system or upgrading existing equipment, professional installation is essential for optimal performance, efficiency, and comfort. Explore our Step-by-Step Builds, Step-by-Step Buys, and Step-by-Step Invest resources for more expert guidance.
When building your own home, always do your due diligence. Consult the professionals you’ve hired—such as your architect, subcontractors, or engineers—and confirm that your work complies with all local building codes and inspections required in your country, state, or province. Builds and Buys is for educational purposes only. Always verify with licensed professionals.
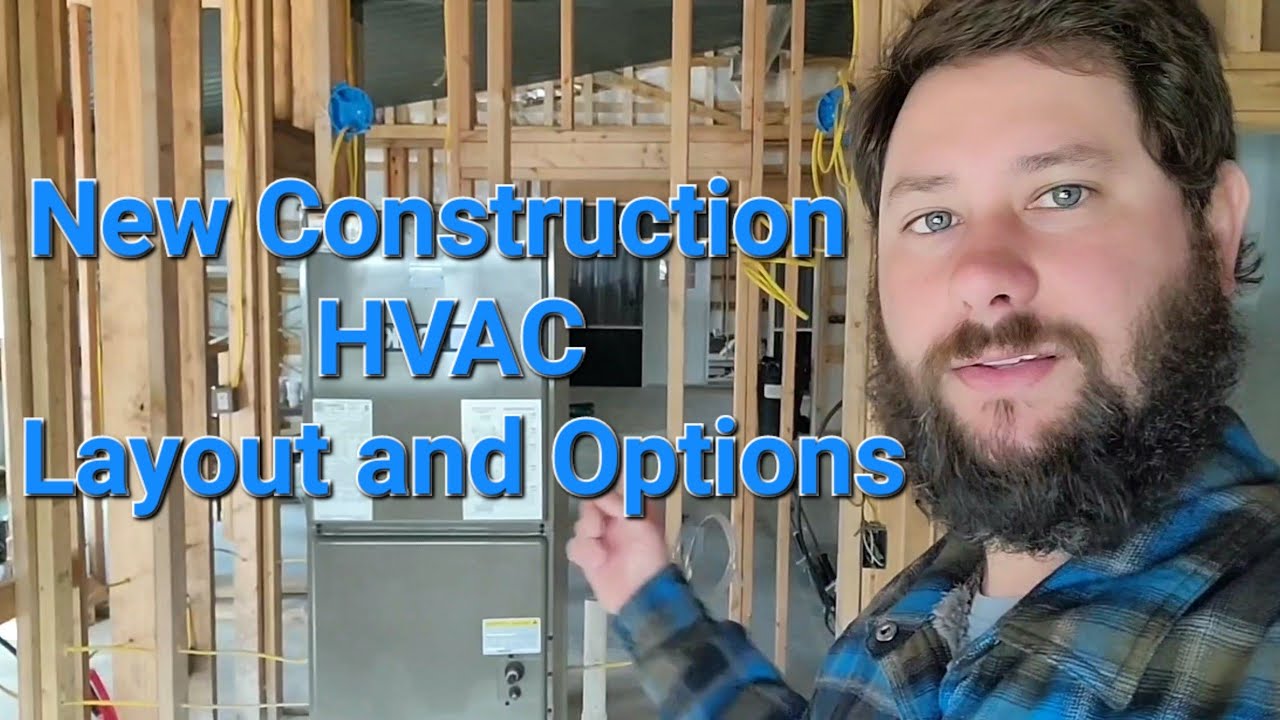
HVAC Heating & Air Rough-In on New Construction | Building A $350,000 Custom House
In today’s episode, we were able to do the heating and air rough-in!! HVAC is a very important step of the way and getting this done gets me one step closer to getting this house built. Building a house is not easy, but it is most definitely worth it!! Enjoy the video y’all!!
Check out more informative Videos
Knowledge Quiz: HVAC Installation
Open Quiz
5 quick questions - see how much you learned!
1) According to the guide, proper HVAC installation can improve system efficiency by what percentage?
Answer: A
The introduction states that "Research shows that proper installation can improve system efficiency by 30% and extend equipment lifespan by 5-10 years."
2) What is the typical BTU requirement per square foot for heating in moderate climates according to the heat load calculation section?
Answer: B
The "System Design and Load Calculation" section specifies "Size units based on BTU requirements (typically 20-25 BTU per square foot for heating in moderate climates)."
3) What is the maximum allowable duct leakage percentage for supply ducts when tested at 25 Pa pressure?
Answer: C
The "Ductwork Design and Installation" section states to "Seal all duct seams with mastic (not duct tape), achieving maximum 6% leakage in supply ducts and 4% in return ducts under testing at 25 Pa pressure."
4) What percentage should you budget above the middle quote to account for hidden HVAC costs according to the guide?
Answer: D
The "Hidden HVAC Costs" section includes the PRO TIP: "Get THREE detailed quotes with line items... Budget 30% above the middle quote for hidden costs."
5) What is the minimum slope requirement for condensate drain lines?
Answer: A
The "Equipment Installation" section specifies "Install primary and secondary drain lines (3/4″ PVC) with minimum 1/4″ per foot slope."
News And Knowledge
Stay informed with the latest trends, insights, and updates in the real estate world.