Interior Finishes 2026: Final Touches for a Beautiful and Functional Space
Interior finishes transform your structure into a beautiful, functional home. Studies show that quality interior finishes can increase property values by 10-15% and significantly impact buyer decisions within the first 7-10 seconds of viewing. This comprehensive guide explores professional finishing techniques, material selection, and expert strategies to ensure your interior delivers maximum aesthetic appeal, functionality, and value.

[Image: Professional Interior Finishing Work in Progress]
⚡ Quick Answers: Interior Finishing Costs, Timelines & Kitchen/Bath Specifics (Click for instant answers)
▼📍 Global Interior Finishing Requirements by Region Kitchen/Bath standards vary DRAMATICALLY worldwide
▼Key Steps in Interior Finishes
These are the critical tasks involved in creating a polished, cohesive interior that balances aesthetics with functionality:
1. Surface Preparation and Priming
Clean, repair, and prime all surfaces to create the ideal foundation for paint and other finishes. Proper preparation directly impacts the durability and appearance of your final surfaces.
- Wall preparation: Fill holes with lightweight spackle for small repairs (up to 1″), setting-type compound for larger repairs, sand with 120-grit followed by 150-grit for smooth transitions
- Primer application: Use PVA primer-sealer on new drywall (coverage: 350-400 sq.ft/gallon), stain-blocking primer on water-damaged areas, apply with 3/8″ nap roller for smooth surfaces
- Surface cleaning: Remove all dust with microfiber cloths or tack cloths before priming/painting, maintaining room temperature between 60°F-85°F with 40-50% humidity for optimal results
2. Interior Painting
Apply paint to walls, ceilings, and trim to establish your color palette and create a fresh, cohesive look throughout the space. Painting is the most impactful and cost-effective way to transform interior spaces.
- Paint selection: Choose appropriate sheen levels – flat/matte (5-10% gloss) for ceilings, eggshell (10-25% gloss) for living areas, satin (25-35% gloss) for kitchens/bathrooms, semi-gloss (35-70% gloss) for trim
- Application technique: Paint in a specific sequence (ceiling → walls → trim) using “W” pattern for walls with 9″ roller, cutting in edges with 2-2.5″ angled sash brush, maintaining wet edge
- Coverage rates: Calculate proper quantities based on coverage rates (350-400 sq.ft/gallon for most quality paints) and plan for two coats plus 10% extra for touch-ups
3. Flooring Installation
Install your chosen flooring materials to establish the foundation of your interior design scheme. Flooring creates both visual impact and tactile experience while defining different zones within your home.
- Subfloor preparation: Ensure subfloor is clean, dry (maximum 3% moisture content for wood installation), level (maximum 3/16″ deviation per 10′), with proper underlayment for specific flooring types
- Material acclimation: Acclimate hardwood for minimum 3-5 days, luxury vinyl for 48 hours, and engineered products for 24-48 hours at installation site temperature (65°F-75°F)
- Installation methods: Use appropriate techniques per material – nail-down for solid hardwood (2″ cleats every 8-10″), click-lock for engineered/laminate (1/4″ expansion gap at perimeter), thin-set mortar for tile (1/4″ x 3/8″ notched trowel)
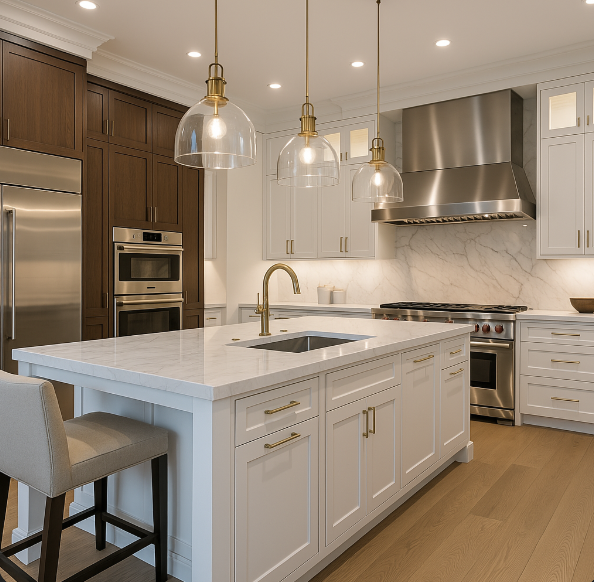
4. Kitchen Cabinet Installation
Assemble and install kitchen cabinets to provide functional storage and establish the kitchen’s aesthetic foundation. Cabinets represent 30-40% of kitchen renovation budgets and significantly impact functionality.
- Layout verification: Confirm cabinet layout with accurate measurements, marking stud locations and checking for level floors/walls (shim as needed for maximum 1/8″ deviation over 8′)
- Installation sequence: Install in specific order (uppers first, then base cabinets), securing to studs with cabinet screws (#10 x 2.5″ minimum) every 16″ through mounting rails
- Alignment precision: Ensure consistent 1/8″ reveals between doors/drawers, maintain standard heights (34.5″ for base cabinets pre-countertop, 18″ from countertop to upper cabinets)
5. Countertop Installation
Install countertops to create attractive, durable work surfaces in kitchens and bathrooms. Countertops must balance aesthetic appeal with practical performance for specific use cases.
- Material considerations: Select appropriate materials based on performance needs – natural stone (requires sealing every 6-12 months), quartz (nonporous, no sealing required), solid surface (repairable, seamless joints), laminate (economical, many design options)
- Support requirements: Ensure proper support with maximum 18″ overhang for 1.25″ granite/quartz (brackets required beyond 12″), maximum 6″ for laminate without support
- Installation details: Apply color-matched silicone adhesive between countertop and cabinets, maintain 1/8″ expansion gap at walls, seal stone materials with penetrating sealer before use
6. Bathroom Fixture Installation
Install sinks, toilets, showers, and bathtubs to complete functional bathroom spaces. Proper installation prevents leaks and ensures fixtures function correctly for years to come.
- Toilet installation: Set with new wax ring on clean flange, securing with corrosion-resistant bolts torqued to 30-40 inch-pounds (hand tight plus 1/4 turn), with 1/4″ maximum side play
- Sink mounting: Install with appropriate technique per type – undermount with silicone adhesive and mounting clips (10″ spacing), drop-in with continuous bead of silicone under rim, pedestal with mounting bracket into studs
- Shower/tub finishing: Apply silicone caulk (not acrylic) at all water-prone joints, maintaining 100% coverage at tub/shower transitions, with 12-24 hour cure time before water exposure
7. Trim Installation and Millwork
Install baseboards, crown molding, door casings, and other decorative trim elements for a refined, finished appearance. Trim details elevate the perceived quality of the entire space.
- Baseboard installation: Install at 3.5″-5.5″ height using 16-gauge finish nails every 16″ into studs and at transitions, cope inside corners for seamless transitions, miter outside corners at 45°
- Crown molding techniques: Position crown at correct spring angle (typically 38°-45° from wall), cut using compound miter saw with crown upside down and backward, secure with 16-gauge nails into ceiling joists and wall studs
- Door casing application: Install side casings first (1/8″-1/4″ reveal from jamb edge), then header piece overlapping sides with 1/16″ proud edge, using 18-gauge nails at 12″-16″ intervals
8. Final Detailing and Touch-Ups
Complete the finishing process with detailed attention to minor imperfections, hardware installation, and thorough cleaning. These final touches significantly impact the perceived quality of the entire project.
- Nail hole filling: Fill trim nail holes with color-matched wood putty or painter’s putty, slightly overfilling then sanding flush with 220-grit sandpaper after drying
- Caulk application: Apply paintable silicone-acrylic caulk to all trim-to-wall transitions and interior trim joints, using 1/8″ bead with immediate tooling for concave profile
- Hardware installation: Install cabinet hardware with alignment jigs for consistency (typically 2.5″-3″ from corner on drawers, 2″-3″ from bottom edge on doors), ensuring secure attachment with proper screw length
Who Handles Interior Finishes?
Interior finishing requires various specialized professionals with specific skills and expertise:
- Professional Painters: Apply primers, paints, and specialty finishes with precision, creating uniform coverage and clean transitions between colors and surfaces
- Flooring Specialists: Install specific flooring materials (hardwood, tile, luxury vinyl, etc.) according to manufacturer specifications and industry best practices
- Cabinet Installers: Assemble and install cabinetry with proper alignment, secure attachment, and functional operation of all doors and drawers
- Countertop Fabricators: Measure, fabricate, and install countertop materials with precise cutouts, seams, and edge treatments
- Finish Carpenters: Install trim, millwork, and custom woodwork with meticulous attention to detail, precise cuts, and seamless joints
- Tile Setters: Install ceramic, porcelain, and stone tiles with consistent spacing, proper adhesion, and professional grouting techniques
- Interior Designers: Coordinate material selections, color palettes, and finishing details to create cohesive, functional, and aesthetically pleasing spaces
- Final Cleaning Specialists: Perform detailed post-construction cleaning to remove all dust, debris, and construction residue from all surfaces
Time & Cost Estimates
The timeline and budget for interior finishing work vary based on project size, material selections, and design complexity. Here are detailed estimates for each major phase:
| Finishing Component | Estimated Time | Estimated Cost | Key Value Points |
|---|---|---|---|
| Surface Preparation & Priming | 2–4 days | $1,200–$3,500 | Creates foundation for all finishes and long-term durability |
| Interior Painting | 3–7 days | $2,500–$7,500 | Establishes color palette and transforms visual appearance |
| Flooring Installation | 3–8 days | $4,500–$15,000 | Provides durable surface with major aesthetic impact |
| Kitchen Cabinet Installation | 2–4 days | $3,000–$12,000 | Creates functional storage and defines kitchen layout |
| Countertop Installation | 1–3 days | $2,000–$8,500 | Provides durable work surfaces with design impact |
| Bathroom Fixture Installation | 2–4 days | $1,800–$7,000 | Completes functional bathroom spaces with key fixtures |
| Trim Installation & Millwork | 2–5 days | $2,500–$6,500 | Adds refined details that elevate overall appearance |
| Final Detailing & Clean-Up | 1–3 days | $800–$2,500 | Ensures polished, move-in ready condition |
| Total Estimates | 16–38 days | $18,300–$62,500 | Complete interior transformation with lasting quality |
These cost estimations provide a general guideline and cover a range from basic to mid-tier builds. They may not reflect costs for high-end or luxury projects. For more precise estimates, consult with professionals based on your specific requirements.
Hidden Interior Finishing Costs That Can Destroy Your Budget
Here’s what contractors don’t mention in their initial quotes—costs that hit 78% of kitchen/bath projects:
The “Surprise” Cost List for Interior Finishes:
| Hidden Cost | Typical Range | How to Avoid/Minimize |
|---|---|---|
| Plumbing Move Kitchen sink not where you thought |
$1,500–$4,000 | Verify exact drain locations before ordering cabinets |
| Subfloor Replacement Rot under old kitchen/bath |
$2,000–$6,000 | Probe with screwdriver before demo day |
| Electrical Upgrades Panel maxed out, need 220V |
$2,500–$5,000 | Check panel capacity BEFORE appliance shopping |
| Asbestos/Lead In old flooring or tile |
$3,000–$10,000 | Test before disturbing anything pre-1980 |
| Cabinet Modifications Don’t fit after all |
$1,000–$3,500 | Template after rough-in, not from plans |
| Matching Existing Paint, trim, flooring transitions |
$1,500–$4,000 | Save samples of everything during build |
| Tile Substrate Floor not flat enough |
$2,000–$5,000 | Check with 10′ straightedge before tile arrives |
| Appliance Delivery Won’t fit through doors |
$800–$2,500 | Measure EVERY doorway and turn |
| Change Orders “While you’re at it…” |
$500–$5,000 | Decide everything before work starts |
| Disposal Fees Old cabinets, fixtures, flooring |
$1,000–$3,000 | Sell/donate old items yourself first |
Interior Finishing Disasters: Real Kitchen & Bath Horror Stories
Learn from these expensive mistakes—actual disasters from interior finishing projects:
⚠️ The $75,000 Kitchen Island Disaster
Location: San Francisco, CA | Loss: $75,000 + 4 months without kitchen
Contractor installed massive granite island without checking floor joists. Weight caused 3″ sag, cracked tiles throughout first floor, damaged plumbing. Had to remove everything, sister all joists, start over.
- Granite = 20 lbs/sq ft (8′ island = 1,200+ lbs)
- Check joist span tables BEFORE ordering
- Engineer consultation: $500 vs $75,000 disaster
- Signs of trouble: doors sticking, floor creaking
⚠️ The Master Bath Waterproofing Nightmare
Location: Miami, FL | Loss: $95,000 + mold remediation
Tiler skipped waterproofing to save time. Two years later, ceiling below collapsed during dinner party. Black mold throughout, joists rotted, insurance denied claim – “improper installation.”
- Proper system: Membrane + flood test BEFORE tile
- Never trust “I’ve always done it this way”
- Document with photos at every stage
- $800 waterproofing vs $95,000 repair
⚠️ The Hardwood Floor Cupping Catastrophe
Location: Atlanta, GA | Loss: $45,000 + legal fees
Installed $30k Brazilian cherry without acclimating. Floors cupped within 60 days, gaps you could fit quarters in. Contractor blamed homeowner’s humidity. Lawsuit took 18 months.
- MINIMUM 7-day acclimation on-site
- Moisture meter readings required (6-9% max)
- HVAC must run during/after install
- Document delivery date with photos
⚠️ The Paint Color Disaster
Location: Chicago, IL | Loss: $25,000 + marriage counseling
Chose colors under showroom lights. “Warm gray” looked purple in north-facing rooms. Repainted entire house twice. Wife moved out during third repaint. “Agreeable Gray” wasn’t agreeable.
- Test 4’x4′ patches in EVERY room
- View morning, afternoon, and evening light
- North rooms: colors look 50% cooler/darker
- Buy samples first: $30 vs $25,000 mistake
⚠️ The Cabinet Door Clearance Chaos
Location: Boston, MA | Loss: $35,000 + custom rebuilds
Beautiful custom cabinets installed. Dishwasher door hit island, refrigerator blocked drawer, corner cabinet doors crashed into each other. “Experienced” designer had never checked clearances.
- Every door/drawer path on paper first
- Add appliance door swings to drawings
- Minimum 42″ walkways in kitchens
- Tape out full-size layout on floor
Interior Finishing Money-Saving Secrets: Kitchen & Bath Gold
Contractors and designers hate when homeowners know these tricks:
🎯 Kitchen Savings That Don’t Look Cheap
Cabinet Hacks (Save $10,000-20,000):
- IKEA boxes + custom doors: 70% savings, looks identical
- RTA cabinets + local assembly: Save 40% vs pre-assembled
- Paint existing + new doors only: $3,000 vs $30,000 replacement
- Open shelving for 30% of uppers: Trendy AND cheaper
Real Example: Client mixed IKEA bases ($3,000) with Semihandmade doors ($4,000). Total: $7,000. Quote for custom: $28,000. Guests can’t tell difference.
💰 Bathroom Brilliance
- Tile strategy: Expensive tile as accent (10%) + basic field tile = 60% savings
- Refinish tub: $500 vs $3,000 replacement (lasts 10+ years)
- Stock vanity + stone top: Looks custom at 50% less
- Skip the bidet: Bidet seat ($300) vs separate fixture ($2,000)
- Shower secret: Acrylic base + tile walls = waterproof AND affordable
🔨 Flooring Intelligence
| Smart Substitution | Savings |
|---|---|
| Luxury vinyl plank instead of hardwood | $4-6/sq ft saved |
| Porcelain wood-look tile (wet areas) | Lasts 50+ years |
| Polished concrete (modern look) | $3-8/sq ft total |
| Buy overstock/discontinued | 50-70% off retail |
🎪 Appliance & Fixture Secrets
- Scratch & dent: 30-50% off for tiny flaws on sides
- Last year’s models: Identical features, 40% less in January
- Builder packages: Negotiate even as homeowner
- Costco/Sam’s: Extended warranties + delivery included
- Mix brands: Matching isn’t mandatory (just similar finishes)
🏆 Countertop Cleverness
- Remnants for bathrooms: Stone yards sell cheap pieces perfect for vanities
- Butcher block + stone: Wood for island, quartz for perimeter
- Concrete DIY: $10/sq ft materials, stunning results
- Quartz vs granite: Level 1 quartz often cheaper than granite + no sealing
- Edge detail matters: Simple edge = $200/slab savings
📅 Timing Your Purchases
Best Times to Buy:
- Appliances: Black Friday, Memorial Day, July 4th (30-40% off)
- Cabinets: October-December (end of year clearance)
- Flooring: Spring (new lines coming, old must go)
- Paint: Labor Day & Memorial Day (BOGO sales)
- Fixtures: January (showrooms clearing displays)
⚠️ Where NOT to Cheap Out:
- Plumbing fixtures: Cheap = leaks = water damage
- Tile labor: Bad install = complete redo
- Kitchen sink: You use it 20x daily
- Paint quality: Good paint = fewer coats + durability
- Drawer slides: Soft-close worth every penny
Future-Proof Your Interior Finishes: Plan Now, Save $40,000+ Later
Smart planning during interior finishing saves massive renovation costs later:
🏠 Aging-in-Place Features
Install NOW for $2,000-5,000 | Retrofit LATER for $15,000-30,000
- Bathroom: Blocking in walls for future grab bars (invisible now)
- Doorways: 36″ minimum (wheelchairs need 32″)
- Shower: Curbless design with linear drain
- Kitchen: Variable height counters or adjustable sections
- Flooring: No transitions over 1/4″ (trip hazards)
- Lighting: Extra switches at 42″ height
💡 Smart Move: Install blocking everywhere during framing – behind toilet, full shower perimeter, beside all stairs. Cost now: $200. Cost to add later: $2,000+ per bathroom.
🔌 Smart Home Integration
Foundation work that enables future upgrades
- Neutral wire in switch boxes: Required for smart switches
- Deep electrical boxes: Smart devices need space
- Under-cabinet channels: Hide future LED strips
- Ceiling fan boxes: Even if installing lights now
- Dedicated circuits: For future high-draw devices
- USB outlets: At least 2 per room
👨🍳 Kitchen Future-Proofing
| Future Need | Install Now | Cost Now vs Later |
|---|---|---|
| Pot Filler | Run water line, cap in wall | $200 vs $1,500 |
| Second Dishwasher | Plumbing & electric rough-in | $400 vs $2,000 |
| Induction Cooking | 220V/50amp circuit | $500 vs $2,500 |
| Built-in Coffee | Water line & drain to location | $300 vs $1,800 |
| Island Expansion | Extra circuits, floor outlets | $600 vs $3,000 |
🚿 Bathroom Future-Proofing
- Bidet-ready: Add hot water line & outlet behind toilet ($150)
- Steam shower prep: Vapor barrier & sloped ceiling ($500)
- Double vanity potential: Rough-in plumbing even for single ($300)
- Heated floors: Install wire/mat under tile now ($800)
- Medicine cabinet power: Outlet inside for gadgets ($100)
- Shower bench blocking: For future fold-down seat ($50)
💰 Resale Value Maximizers
- Timeless finishes: White/gray cabinets, subway tile, quartz counters
- Hardwood floors: Can refinish to match any future trend
- Neutral paint: But keep color formulas for touch-ups
- Quality hardware: Easy to swap styles, but good quality shows
- Storage maximization: Built-ins and closet systems huge selling point
⚠️ Document Your Finishes!
Create a “house manual” with:
- Paint colors (brand, name, sheen, formula)
- Flooring info (manufacturer, style, lot numbers)
- Tile details (where purchased, pattern layout)
- Cabinet specs (door style for future matching)
- All warranties and care instructions
This manual is worth $5,000+ when you need to match something!
Interior Finishes Cost Calculator: Real Numbers by Room
Stop getting shocked by quotes. Here’s what interior finishes ACTUALLY cost:
Kitchen Finishing Costs by Level
| Kitchen Size | Basic (Stock, laminate) |
Mid-Range (Semi-custom, quartz) |
High-End (Custom, natural stone) |
|---|---|---|---|
| Small (< 100 sq ft) | $12,000-18,000 | $20,000-35,000 | $40,000-60,000 |
| Medium (100-200 sq ft) | $18,000-25,000 | $30,000-50,000 | $60,000-100,000 |
| Large (> 200 sq ft) | $25,000-35,000 | $45,000-75,000 | $100,000-200,000+ |
Bathroom Finishing Costs
| Bathroom Type | Basic (Builder grade) |
Mid-Range (Designer fixtures) |
Luxury (High-end everything) |
|---|---|---|---|
| Powder Room | $3,000-5,000 | $6,000-10,000 | $12,000-20,000 |
| Full Bath (5×8) | $8,000-12,000 | $15,000-25,000 | $30,000-50,000 |
| Master Bath (8×10+) | $15,000-20,000 | $25,000-40,000 | $50,000-100,000+ |
Cost Breakdown by Component:
| Component | % of Kitchen Budget | % of Bath Budget |
|---|---|---|
| Cabinets/Vanities | 35-40% | 20-25% |
| Labor | 20-25% | 40-45% |
| Countertops | 10-15% | 5-10% |
| Appliances/Fixtures | 15-20% | 15-20% |
| Flooring/Tile | 10-15% | 15-20% |
Other Room Finishing Costs:
| Room/Area | Basic Finish | Quality Finish |
|---|---|---|
| Living Room (15×20) | $3,000-5,000 | $6,000-12,000 |
| Bedroom (12×14) | $2,000-3,500 | $4,000-8,000 |
| Dining Room (12×14) | $2,500-4,000 | $5,000-10,000 |
| Home Office (10×12) | $2,000-3,500 | $4,000-8,000 |
| Basement (1000 sq ft) | $8,000-15,000 | $20,000-40,000 |
⚠️ What Makes Costs Skyrocket:
- Moving plumbing: Add $1,500-4,000 per fixture
- Structural changes: Add $5,000-15,000
- Custom anything: 2-3x the cost of semi-custom
- Rush timeline: Add 25-50% for overtime
- Living in home during work: Add 20-30% for logistics
- High-end finishes: Easily triple the base cost
💡 Use Our Interactive Task Pages!
Track every finish detail with our comprehensive interior finishing checklist. Never forget paint colors, tile patterns, or warranty information again.
→ Access Interior Finishes Task ChecklistInterior Finishes Q&A: Kitchen & Bath Questions Answered
Here are the questions every homeowner asks (and the honest answers):
Q: “Should I really spend $50k on a kitchen I might sell in 5 years?”
A: No, unless you’re staying 10+ years. ROI reality: You’ll recoup 60-80% on resale. Better strategy for 5-year timeline: Spend $25-30k on mid-range finishes that look expensive. Focus on: painted cabinets (not stained), quartz counters (not granite), quality hardware, and good lighting. Skip: Built-in refrigerator ($10k), pot filler ($1k), and wine fridge ($3k). These don’t add equivalent resale value.
Q: “Quartz vs granite vs marble—what’s the real difference?”
A: Quartz: Engineered, zero maintenance, consistent pattern, $60-100/sq ft. Can’t take extreme heat (trivets required). Granite: Natural, needs yearly sealing, unique patterns, $50-120/sq ft. Heat-proof but can stain/etch. Marble: Gorgeous but high-maintenance, $70-200/sq ft. WILL stain and etch—even water glasses leave rings. Truth: 90% of people should choose quartz. Marble is for people who love patina or have housekeepers.
Q: “Do I really need to pull permits for interior work?”
A: YES for: Moving walls, plumbing, electrical, or gas. Maybe for: Replacing kitchen/bath fixtures in same locations. No for: Painting, flooring, replacing cabinets. Warning: Unpermitted work can void insurance claims and kill home sales. Buyers’ inspectors WILL check permit history. Cost of permits ($500-2000) is nothing compared to redoing work or losing a sale.
Q: “How do I keep my white kitchen from looking sterile?”
A: Layers and textures, not color. Add: Wood elements (island, shelves, stools), mixed metals (brass + black or nickel + black), textured backsplash (handmade tile, not subway), statement lighting (oversized pendants), and natural elements (wood bowls, plants). Skip the colored island trend—it’ll date your kitchen in 5 years. Warmth comes from materials, not paint colors.
Q: “LVP vs hardwood vs tile—which flooring is actually best?”
A: Depends on your life: Hardwood: Beautiful, adds value, can refinish, but water = death. $8-15/sq ft installed. LVP (Luxury Vinyl Plank): Waterproof, looks 90% like wood, quiet, warm underfoot. $4-8/sq ft. Tile: Indestructible, cold, hard, grout maintenance. $5-15/sq ft. Reality check: LVP technology is so good now that most people can’t tell the difference. If you have kids/pets/real life, LVP wins.
Q: “Why do bathroom renovations cost as much as kitchens?”
A: Water is expensive to control. Bathrooms require: Waterproofing ($1,500-3,000), moving plumbing in concrete slabs ($2,000-5,000), tile labor ($10-20/sq ft), and everything is custom-fit. Plus, mistakes = mold = house cancer. A “simple” bathroom has 20+ water connection points that can fail. Kitchens are mostly cabinets and counters. Bathrooms are complex systems disguised as small rooms.
Q: “How do I find a contractor who won’t disappear mid-job?”
A: Never hire based on price alone. Check: License status (call state board), insurance certificates (call insurer to verify), 10+ references from last 2 years, and their current job sites. Red flags: Cash only, no fixed address, “I’ll get permits later,” too available (good ones are booked), and prices 30%+ below others. Pay max 30% upfront, then progress payments tied to completed work. Hold 10% until EVERYTHING is done.
Best Time for Interior Finishing Work (Save 20-35%)
Timing affects both price and quality. Here’s when to schedule each trade:
| Region | BEST Months (Save Money) |
OK Months (Normal Price) |
AVOID (Premium/Problems) |
Why Timing Matters |
|---|---|---|---|---|
| Northeast US | Jan-Mar | Nov-Dec, Apr | May-Oct | Contractors busy with exteriors in summer |
| Southeast US | Jun-Aug | May, Sep | Oct-Apr | Everyone renovates for holidays/spring |
| Pacific NW | Jan-Mar | Nov-Dec | Apr-Oct | Slow season = better prices & attention |
| Southwest US | Jun-Aug | May, Sep | Oct-Apr | Snowbird season = contractor shortage |
| Midwest US | Dec-Feb | Nov, Mar | Apr-Oct | Interior season when too cold outside |
| Mountain West | Nov-Mar | Oct, Apr | May-Sep | Short building season = winter discounts |
📅 Trade-Specific Timing Secrets:
Best Times by Trade:
- Cabinet Installers: January-February (post-holiday slow)
- Tile Setters: Winter months (can’t do exteriors)
- Painters: January-March (after holiday decorating)
- Flooring Crews: Post-Super Bowl to March (dead zone)
- Plumbers: Avoid spring (busy with AC prep)
Holiday Considerations:
- NEVER start: November 15-January 5 (holidays kill schedules)
- July 4th week: Ghost town, no deliveries
- Spring break: Subs vanish for vacation
- August: European tile/fixture delays
Material Order Timing:
- Cabinets: Order 8-12 weeks before install
- Appliances: 2-4 weeks (unless European = 12-16 weeks)
- Tile: 2-3 weeks + 20% extra for breakage
- Plumbing fixtures: 4-8 weeks for designer brands
- Custom anything: Double the timeline quoted
⚠️ Living Through Renovation Reality:
- No kitchen: Budget $100/day for takeout (family of 4)
- Dust everywhere: Plastic walls don’t stop it all
- Noise: 7 AM starts are standard (check local ordinances)
- No privacy: Workers need access 5-6 days/week
- Timeline lies: Add 50% to any estimate if living in home
PRO TIP: Rent an Airbnb for the worst 2 weeks (demo and drywall). Your marriage will thank you.
Cost-Saving Tips
Optimize your interior finishing investment with these expert strategies:
- Strategic material allocation: Invest in premium materials for high-visibility/high-use areas (kitchen countertops, main living area flooring) while using more economical options in secondary spaces, reducing overall costs by 15-25%
- Paint quality optimization: Use higher-grade paint on walls (better coverage requires fewer coats) while selecting contractor-grade products for ceilings and closets, saving 10-15% on painting costs
- Cabinetry hybrid approach: Install custom or semi-custom cabinets for feature areas (kitchen island, bathroom vanities) with stock cabinets elsewhere, achieving a custom look for 25-30% less
- Flooring transition strategy: Use premium flooring in main living areas with more economical but coordinated options in bedrooms and utility spaces, maintaining design cohesion while reducing costs by 20-30%
- Trim package scaling: Install more substantial trim profiles in primary spaces (living room, dining room) with simpler profiles in secondary areas while maintaining consistent paint color for visual continuity
- Off-season scheduling: Book interior finishing work during contractors’ slower periods (typically mid-winter or mid-summer) when many offer 10-15% discounts to maintain workforce utilization
Related Construction Guides
Continue your construction journey with these essential guides:
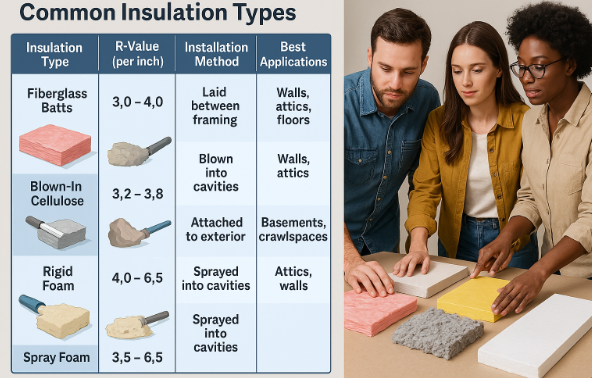
Insulation & Drywall
Must be complete before interior finishes. Learn proper installation for smooth walls.
Read More →Plumbing Installation
Critical to complete before finishes. Understand rough-in for kitchen and bath.
Read More →Electrical Wiring
Plan lighting and outlets before walls close. Essential for kitchen planning.
Read More →Landscaping
Your next step after interior finishes. Complete the home with curb appeal.
Read More →HVAC Installation
Climate control affects paint drying, flooring acclimation, and comfort.
Read More →Complete Build Process
See all construction steps from foundation to move-in ready.
Read More →Summary: Your Interior Finishes Action Plan
1. Prioritize Proper Planning and Sequencing
Develop a detailed interior finishing schedule that coordinates the proper sequence of work (generally top-down: ceilings → walls → floors) and material delivery timing. This prevents damage to completed finishes and reduces rework and waste.
2. Balance Quality, Budget, and Timeline
Make strategic decisions about where to invest in premium materials and professional installation versus where to economize. Focus resources on high-impact, high-visibility elements while finding reasonable savings in secondary areas.
3. Document and Inspect All Completed Work
Maintain detailed records of all materials, finishes, and paint colors used in your project. Conduct thorough inspections of each completed phase before final payment, addressing any issues immediately while contractors are still on-site.
Interior finishes create the living environment you’ll experience daily and significantly impact your property’s value. Following these professional guidelines ensures that your interior spaces will provide lasting beauty, functionality, and enjoyment for years to come.
Complete Your Interior Finishes With Confidence
Track Your Progress: Monitor your finishing milestones with our interactive tools
Stay Notified: Receive alerts for material deliveries, contractor scheduling, and inspection points
Step-by-Step Guidance: Follow detailed instructions on material selection, installation techniques, and quality verification
Reduce Stress: Keep all finish specifications, color information, and warranty details organized in one secure location
Whether you’re completing a new build or renovating existing spaces, professional interior finishes transform your property into a beautiful, functional home that reflects your personal style. Explore our Step-by-Step Builds, Step-by-Step Buys, and Step-by-Step Invest resources for more expert guidance.
When building your own home, always do your due diligence. Consult the professionals you’ve hired—such as your architect, subcontractors, or engineers—and confirm that your work complies with all local building codes and inspections required in your country, state, or province. Builds and Buys is for educational purposes only. Always verify with licensed professionals.
The WORST flooring choices, that could TANK your homes value.
When it comes to selling your home, flooring choices can make or break a deal. Opting for cheap laminate or carpet might save you money upfront, but it often results in a less appealing look and faster wear, turning off potential buyers. Tiling the entire house might seem like a durable choice, but it can be a risky move, as it may not appeal to all buyers and can feel too cold or industrial and its EXPENSIVe to remove. The wrong flooring can detract from your home’s overall value, making it harder to sell quickly and for the price you want. Invest in quality flooring to ensure your home appeals to the widest range of buyers and stands out in the market.
Check out more informative Videos


3 Kitchen Cabinets To AVOID in Your Kitchen Layout!
When you’re designing a kitchen cabinet layout, it’s easy to get carried away. The options in the kitchen for accessories, pullouts, pantries and fixtures to match is never ending. But, I’ll save you a little time. These 3 cabinets suck. They waste your money. Worst of all, they just don’t work right or last!
Check out more informative Videos


Architect’s TOP 10 Bathroom Design Mistakes (& How to Fix Them)
This is not design advice, nor can I give you design advice. Everything in this video is conceptual and is for entertainment purposes only and not for the purpose of providing design advice. Nothing in this video should be construed to form an architect client relationship. You should contact your own architect to obtain advice regarding any particular project. When hacking furniture, you do so at your own risk. This video was sponsored by Bellroy.
Check out more informative Videos


Knowledge Quiz: Interior Finishes
Open Quiz
5 quick questions - see how much you learned!
1) According to the guide, quality interior finishes can increase property values by what percentage?
Answer: A
The introduction states that "Studies show that quality interior finishes can increase property values by 10-15% and significantly impact buyer decisions within the first 7-10 seconds of viewing."
2) What is the correct sequence for painting interior spaces?
Answer: C
The "Interior Painting" section specifies "Paint in a specific sequence (ceiling → walls → trim)."
3) What is the maximum allowable moisture content in subfloors for wood flooring installation?
Answer: B
The "Flooring Installation" section states "Ensure subfloor is clean, dry (maximum 3% moisture content for wood installation)."
4) What contingency percentage does the guide recommend for kitchen and bathroom budgets?
Answer: D
The "Hidden Interior Finishing Costs" section includes the PRO TIP: "Add 30% contingency to kitchen/bath budgets, 20% for other rooms."
5) What is the standard height for base cabinets before countertop installation?
Answer: A
The "Kitchen Cabinet Installation" section specifies to "maintain standard heights (34.5″ for base cabinets pre-countertop, 18″ from countertop to upper cabinets)."
News And Knowledge
Stay informed with the latest trends, insights, and updates in the real estate world.