🏛️ Outdoor Pavilion Cost Guide 2026
Complete pricing for pavilions, gazebos, and outdoor living structures
💰 Outdoor Pavilion Cost Overview
Basic Kit
Custom Build
Premium Design
Installation
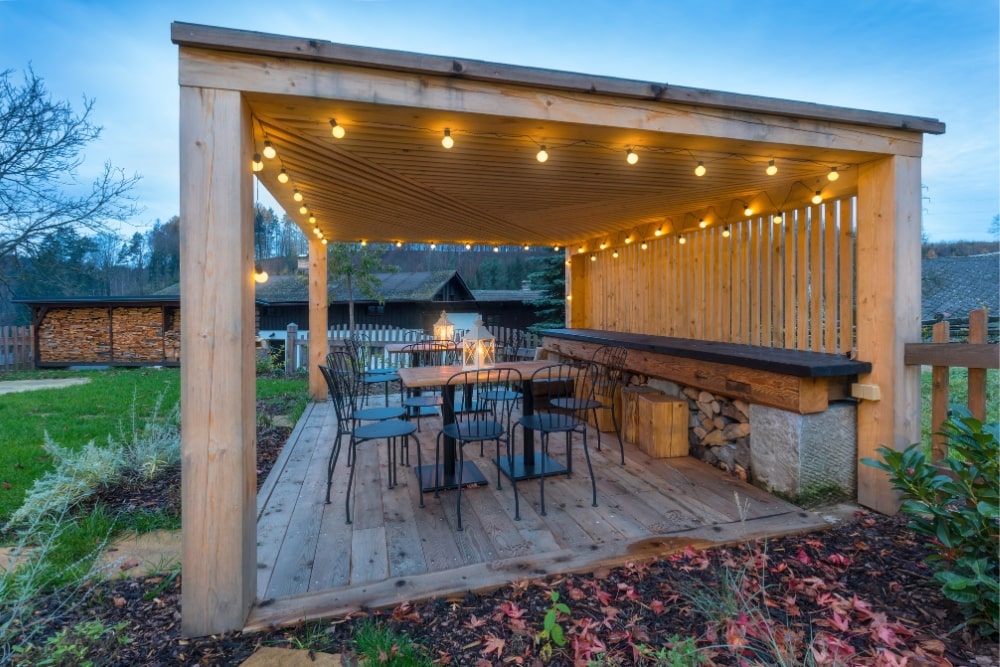
Outdoor Pavilion Examples (Backyard Pavilions, Gazebos, Timber Frame Designs, Outdoor Living Setups)
Pavilion Types & Complete Costs
Every outdoor structure option with pricing, features, and specifications
Complete Pavilion Pricing
| Pavilion Type | Price Range | Common Sizes | Key Features | Lifespan |
|---|---|---|---|---|
| Wood Pavilion Kit | $3,000 – $8,000 | 10×10 to 14×14 | DIY-friendly, basic roof | 15-25 years |
| Vinyl Pavilion | $4,000 – $10,000 | 12×12 to 16×16 | Low maintenance, weather resistant | 20-30 years |
| Cedar Custom Build | $8,000 – $20,000 | 14×16 to 20×20 | Natural beauty, customizable | 25-35 years |
| Metal/Aluminum | $5,000 – $12,000 | 12×12 to 16×20 | Modern look, durable | 30-40 years |
| Timber Frame | $15,000 – $40,000 | 16×20 to 24×24 | Exposed beams, premium | 40-50 years |
| Gazebo Style | $3,500 – $9,000 | 10′ to 14′ diameter | Octagonal, decorative | 15-25 years |
| Pergola Pavilion | $2,500 – $8,000 | 10×12 to 16×20 | Open roof design | 15-20 years |
| Pool Pavilion | $10,000 – $25,000 | 16×20 to 20×30 | Changing areas, storage | 25-35 years |
Critical Pavilion Construction Warnings
Building permits REQUIRED in 95% of areas – fines up to $5,000 for unpermitted structures! Setback requirements typically 5-10 feet from property lines. Foundation is NOT optional – frost footings required in cold climates, concrete piers minimum everywhere else. Wind ratings crucial – hurricane zones need 130+ mph rated structures. Electrical work requires licensed electrician – DIY wiring voids insurance and creates fire hazards. Height restrictions common – many areas limit to 15 feet. HOA approval often required with specific design standards. Utility lines overhead and underground – call 811 before digging or face massive fines. Proper roof pitch essential (4/12 minimum) to prevent water damage and collapse. Pressure-treated lumber ground contact requires special fasteners to prevent corrosion. Never attach to house without engineering approval – improper attachment causes structural damage. Snow load calculations critical in northern climates. Insurance notification required – some policies exclude or limit coverage for detached structures.
Complete Installation & Construction Costs
Total investment breakdown for pavilion projects
Pavilion Project Cost Breakdown
| Project Component | DIY Cost | Professional Cost | Importance | Notes |
|---|---|---|---|---|
| Site Preparation | $200 – $500 | $500 – $1,500 | Critical | Level ground essential |
| Foundation/Footings | $500 – $1,500 | $1,500 – $4,000 | Required | 4 posts minimum |
| Concrete Slab | $800 – $2,000 | $2,000 – $5,000 | Optional | $4-8 per sq ft |
| Structure Assembly | 16-40 hours | $1,500 – $5,000 | Complex | 2-4 person job |
| Roofing Material | $500 – $2,000 | $1,000 – $3,500 | Varies | Shingles to metal |
| Electrical Work | Not recommended | $800 – $2,500 | Professional only | Lights, outlets, fans |
| Permits | $150 – $500 | Often included | Required | Varies by locality |
| Landscaping | $200 – $800 | $500 – $2,000 | Finishing touch | Paths, plantings |
Popular Pavilion Features & Add-On Costs
| Feature/Add-On | Cost Range | Installation | Popular For | ROI Impact |
|---|---|---|---|---|
| Ceiling Fan | $200 – $500 | Electrical required | Hot climates | High comfort value |
| Built-in Lighting | $500 – $1,500 | Professional | Evening use | Extends usability |
| Outdoor Kitchen | $3,000 – $15,000 | Multiple trades | Entertainment | Premium feature |
| Fireplace/Fire Pit | $1,500 – $5,000 | Gas line needed | Year-round use | Major attraction |
| Retractable Screens | $2,000 – $5,000 | Custom fit | Bug protection | Comfort upgrade |
| Bar/Counter | $800 – $3,000 | Carpentry | Entertainment | Social focal point |
| Privacy Walls | $500 – $2,000 | Per wall | Wind/privacy | Functional value |
Factors Affecting Pavilion Costs
What determines your final outdoor structure investment
Major Cost Variables
Size & Design
Small (10×10):
• Basic coverage
• Intimate seating
• $3,000-6,000
Large (20×20+):
• Full outdoor room
• Multiple zones
• $15,000-30,000+
Material Selection
Pressure-treated:
• Budget option
• Requires staining
• 15-20 year life
Cedar/Redwood:
• Natural resistance
• Premium appearance
• 2-3x PT cost
Site Conditions
Level site:
• Standard installation
• Normal foundation
• Base pricing
Sloped/rocky:
• Extended posts
• Extra excavation
• +$1,000-3,000
Roof Style
Gable roof:
• Traditional look
• Good drainage
• Standard cost
Hip roof:
• Premium style
• Complex framing
• +20-30% cost
Utilities
No utilities:
• Daytime use only
• Simple structure
• Base pricing
Full electric:
• Lights, fans, outlets
• Permits required
• +$1,500-3,000
Access & Location
Easy access:
• Equipment access
• Standard delivery
• Normal costs
Limited access:
• Manual transport
• Crane rental
• +$500-2,000
Pavilion Design & Style Options
Popular designs for every outdoor living need
Design Styles & Typical Uses
| Design Style | Best For | Key Features | Typical Cost Range |
|---|---|---|---|
| Traditional Gable | Classic backyards, family gatherings | Peaked roof, open sides | $5,000 – $12,000 |
| Modern Flat Roof | Contemporary homes, minimalist | Clean lines, sleek design | $4,000 – $10,000 |
| Rustic Timber Frame | Lodge style, natural settings | Heavy beams, mortise joints | $15,000 – $35,000 |
| Asian-Inspired | Zen gardens, meditation spaces | Curved roof lines, details | $8,000 – $18,000 |
| Pool House Style | Pool areas, changing rooms | Enclosed sides, storage | $12,000 – $25,000 |
Real Estate Investment Returns
Pavilion ROI for different property strategies
Primary Residence
ROI: 50-80% value return
Investment: $8,000-20,000
Benefits:
• Extends living space
• Year-round entertaining
• Major lifestyle upgrade
• Strong buyer appeal
Rental Property
ROI: Through premium rent
Strategy: Vacation rentals only
Budget: $5,000-10,000
Impact:
• $200-500/month premium
• Photo appeal crucial
• Low maintenance design
• Weather-resistant materials
Fix & Flip
ROI: 60-80% typical
Strategy: Entertainment focus
Budget: $5,000-12,000
Key factors:
• Creates “wow” factor
• Defines outdoor room
• Stage for showings
• Skip in starter homes
DIY vs Professional Installation
When to tackle pavilion construction yourself
Installation Method Comparison
DIY Installation
Save: $1,500-5,000
Time: 3-5 weekends
Good for:
• Small kits (10×10)
• Experienced builders
• Simple designs
• Level sites
Need: 3-4 helpers
Professional Build
Cost: $1,500-5,000 labor
Time: 2-5 days
Includes:
• Foundation work
• Permit handling
• Structural warranty
• Code compliance
• Cleanup/disposal
Common DIY Mistakes
• Inadequate footings
• Wrong beam sizing
• Poor site drainage
• Incorrect roof pitch
• Code violations
• Uneven posts
• Weak connections
DIY Success Tips
• Rent proper equipment
• Follow plans exactly
• Check level constantly
• Use quality fasteners
• Don’t skip permits
• Allow extra time
• Have backup help
When Pros Essential
• Custom designs
• Electrical work
• Large structures
• Attached pavilions
• Complex roofing
• Time constraints
Hybrid Approach
Pro foundation + DIY build:
• Critical base done right
• Save on assembly
DIY structure + Pro roof:
• Weatherproofing assured
• Warranty on critical component
Money-Saving Strategies
Get your dream pavilion without overspending
Off-Season Building
Fall/winter construction saves 15-25% on labor. Contractors need work when demand drops. Materials often discounted. Foundation work still possible in most climates until ground freezes.
Salvaged Materials
Reclaimed beams save 50-70% and add character. Architectural salvage yards gold mines for unique posts and brackets. Used metal roofing perfectly functional at fraction of new cost.
Start Basic, Upgrade Later
Build structure now, add electricity/features over time. Basic pavilion provides immediate use. Adding sides, screens, amenities spreads cost over years as budget allows.
DIY Foundation Prep
Excavate post holes yourself saves $500-1,500. Rent auger for $150/day. Pros pour concrete and ensure level, but digging is simple labor you can handle.
Group Material Buys
Coordinate with neighbors building decks/fences. Bulk lumber delivery saves 10-20%. Share equipment rental costs. Some suppliers offer contractor pricing for large orders.
Strategic Sizing
Design using standard lumber dimensions avoids waste. 12×16 uses full boards efficiently vs custom 13×17. Smart sizing can save $500-1,000 in materials without sacrificing function.
Frequently Asked Questions
Expert answers about pavilions and outdoor structures
🏛️ Ready to Create Your Outdoor Living Space?
Find qualified pavilion builders and designers
Knowledge Quiz: Outdoor Pavilion Cost Guide
Open Quiz
5 quick questions - see how much you learned!
1) What is the overview price range for a Basic Kit outdoor pavilion?
Answer: B
The overview lists a Basic Kit pavilion at $3,000 – $7,000.
2) Which pavilion type has the longest listed lifespan in the table?
Answer: C
The table shows Timber Frame with the longest lifespan at 40–50 years.
3) According to the warnings, permits are required in approximately what percentage of areas?
Answer: A
The guide warns that building permits are required in about 95% of areas for pavilions.
4) What is the typical professional installation (assembly) cost range shown in the overview?
Answer: D
The overview lists Installation at $1,500 – $5,000 for professional assembly.
5) Which add-on is listed at roughly $2,000 – $5,000 and is popular for bug protection?
Answer: B
Retractable Screens are shown at $2,000 – $5,000 and help with bug protection.
6) Which component is marked “Professional only” and has a cost range of $800 – $2,500?
Answer: C
The breakdown lists Electrical Work as Not recommended DIY (pro only), at $800 – $2,500.
7) In the ROI section, what is the typical ROI return range for a primary residence pavilion?
Answer: A
The guide estimates 50–80% value return for a pavilion on a primary residence.
🌿 More Landscaping Cost Guides
Explore our complete outdoor improvement library
View All Landscaping Guides (25+) ▼
🌱 Lawn & Turf Services
🌳 Trees & Plants
💧 Water & Irrigation
🎨 Design & Hardscaping
🏗️ Structures & Recreation
Last updated: Jan 2026
Sources: National Association of Home Builders, International Building Code Council, American Wood Council, Timber Frame Guild, Professional Deck and Patio Association, Builds and Buys Research Team


