🌊 Shiplap Installation Cost Guide 2026
Transform your walls with trendy shiplap – Joanna Gaines’ favorite!
💰 Shiplap Installation Cost Overview
Pine Shiplap
MDF Shiplap
Accent Wall
Full Room
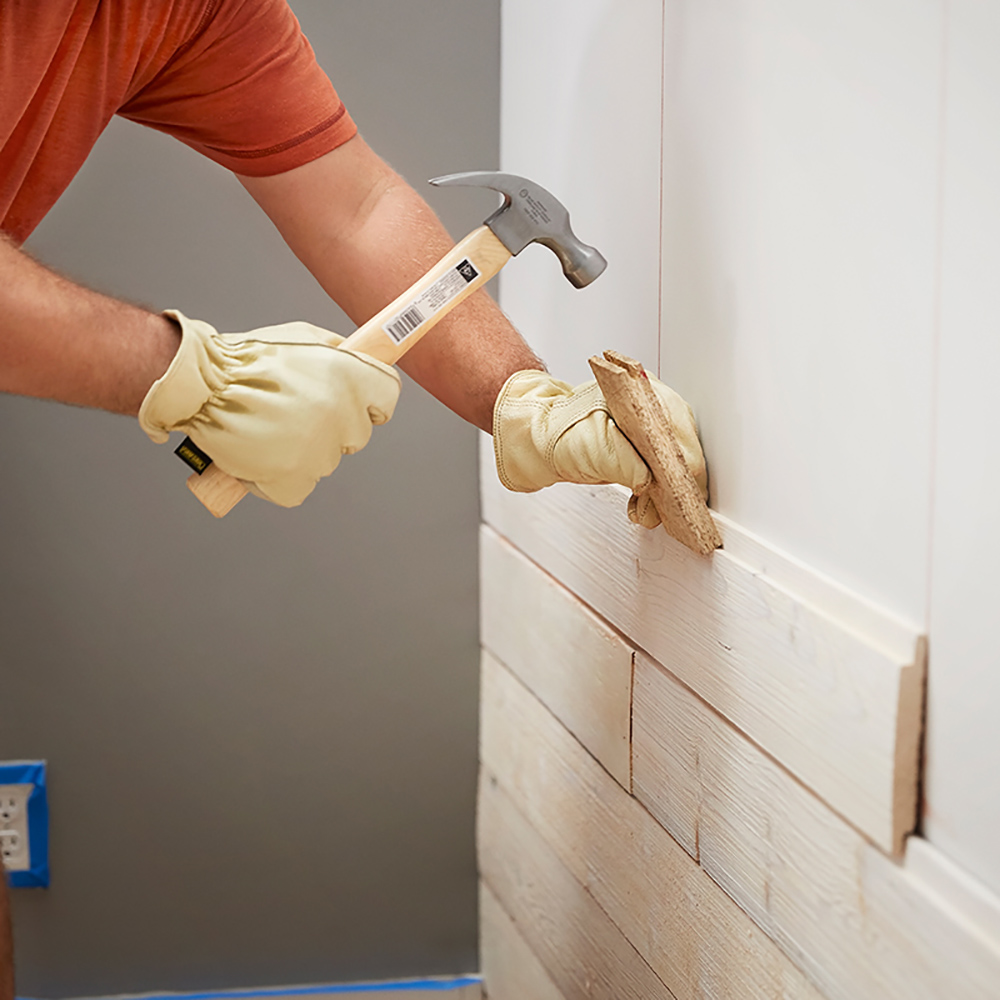
Professional Shiplap Installation Example
Shiplap Materials & Installation Costs
Complete pricing for every shiplap type and wood species
Shiplap Material Options & Pricing
| Material Type | Material Cost | Labor Cost | Total per sq ft | Pros & Cons |
|---|---|---|---|---|
| Pine (Most Popular) | $1.00 – $2.50 | $2.00 – $2.50 | $3.00 – $5.00 | Affordable, stainable, can warp |
| MDF/Primed | $0.75 – $1.50 | $1.50 – $2.50 | $2.25 – $4.00 | Smooth finish, no knots, moisture sensitive |
| Cedar | $2.50 – $5.00 | $2.50 – $3.00 | $5.00 – $8.00 | Weather resistant, beautiful, expensive |
| Reclaimed Wood | $3.00 – $8.00 | $3.00 – $4.00 | $6.00 – $12.00 | Character, eco-friendly, limited supply |
| PVC/Vinyl | $1.50 – $3.00 | $2.00 – $3.00 | $3.50 – $6.00 | Waterproof, no painting, looks fake |
| Nickel Gap | $1.25 – $3.00 | $2.00 – $3.00 | $3.25 – $6.00 | Clean lines, modern, precise install |
| Plywood Planks | $0.50 – $1.25 | $2.00 – $2.50 | $2.50 – $3.75 | DIY friendly, budget, needs sealing |
| Whitewood | $0.85 – $2.00 | $2.00 – $2.50 | $2.85 – $4.50 | Smooth, paints well, basic option |
Critical Shiplap Considerations
Gap spacing matters: Traditional 1/8″ nickel gap vs tight fit changes entire look. Moisture areas: Never use MDF in bathrooms – it will swell and fail. Behind installation: Paint wall black or dark color first for dramatic gap effect. Real vs fake: Peel-and-stick “shiplap” wallpaper exists but looks cheap – spend the extra for real wood.
Installation Patterns & Costs
Different shiplap orientations and their price impact
Shiplap Installation Patterns
| Pattern Style | Labor Premium | Material Waste | Visual Impact | Difficulty |
|---|---|---|---|---|
| Horizontal (Classic) | Standard rate | 5-10% | Makes room feel wider | Easiest |
| Vertical | +10-15% | 10-15% | Makes ceiling look higher | Moderate |
| Diagonal | +25-40% | 15-20% | Dynamic, modern | Difficult |
| Chevron/Herringbone | +50-75% | 20-25% | Luxury, eye-catching | Expert only |
| Mixed Width | +15-25% | 10-15% | Custom, unique | Moderate |
| Half Wall Only | -30-40% | 5% | Accent feature | Easy |
Room-by-Room Shiplap Costs
| Room/Area | Typical Coverage | Budget Option | Mid-Range | Premium |
|---|---|---|---|---|
| Accent Wall (12′) | 96 sq ft | $216 – $360 | $288 – $480 | $480 – $960 |
| Bedroom (12×12) | 384 sq ft | $864 – $1,440 | $1,152 – $1,920 | $1,920 – $3,840 |
| Living Room (16×20) | 576 sq ft | $1,296 – $2,160 | $1,728 – $2,880 | $2,880 – $5,760 |
| Master Bedroom (15×18) | 528 sq ft | $1,188 – $1,980 | $1,584 – $2,640 | $2,640 – $5,280 |
| Bathroom (8×10) | 256 sq ft | N/A – Use PVC | $896 – $1,536 | $1,280 – $2,560 |
| Kitchen Backsplash | 30 sq ft | $75 – $113 | $90 – $150 | $150 – $300 |
| Ceiling Application | Per room | +30% labor | +30% labor | +30% labor |
Installation Process & Timeline
Step-by-step shiplap installation breakdown
Shiplap Installation Steps
Day 1: Prep & Layout
Time: 3-4 hours
Tasks:
• Remove outlet covers
• Find/mark studs
• Install furring strips if needed
• Paint wall dark (optional)
• Snap chalk lines
Day 2: First Boards
Time: 4-6 hours
Critical:
• Level first board perfectly
• Use spacers for gaps
• Face nail into studs
• Check level every 3 rows
• Cut around outlets carefully
Day 3: Main Installation
Time: 6-8 hours
Process:
• Continue row by row
• Stagger joints minimum 16″
• Maintain consistent gaps
• Use construction adhesive
• Nail every 16-24″
Day 4: Finishing
Time: 4-6 hours
Final steps:
• Fill nail holes
• Caulk edges if painting
• Sand rough spots
• Prime if raw wood
• Apply finish coat
Electrical Work
Added cost: $50-100/outlet
Requirements:
• Extend outlet boxes
• Add box extenders
• Maintain code depth
• May need electrician
• Plan cuts precisely
Quality Details
Pro touches:
• Consistent gap spacing
• Level installation
• Proper staggering
• Clean cuts
• Smooth finish
Real Estate Investment Analysis
Shiplap ROI for different property strategies
Primary Residence
Best use: Accent walls
Investment: $500-2,000
Value add: $1,000-3,000
Benefits:
• Trendy appeal
• Instagram worthy
• 150-200% ROI
Rental Property
Skip it: Too trendy
Alternative: Regular paint
Risk: Damage prone
Exception: Vacation rentals
• Trends fade fast
• Maintenance issues
• Minimal rent impact
Fix & Flip
Strategic use: Entry/dining
Investment: $800-1,500
Return: $2,000-4,000
Impact:
• Buyer magnet
• Photos great
• 250% ROI possible
Short-Term Rental
Perfect fit: Instagram walls
Investment: $1,000-2,500
Booking boost: 10-20%
Benefits:
• Photo backdrop
• Five-star reviews
• Farmhouse vibe
Common Mistakes & How to Avoid Them
Learn from costly shiplap installation errors
Critical Shiplap Mistakes
Crooked First Board
Mistake: Rushing the start
Reality: Entire wall crooked
Fix: Level first board perfectly
Impact: Compounds with each row
• Use laser level
• Check every 3 boards
Visible Nail Heads
Mistake: Face nailing everywhere
Reality: Looks amateur
Fix: Nail through tongues
Or: Countersink and fill
• Use finish nailer
• 18-gauge brads best
Wrong Material in Bathroom
Mistake: Using MDF/pine
Reality: Swells, rots, molds
Fix: PVC or sealed cedar
Cost of mistake: Full replacement
• Seal all sides
• Ventilation crucial
Inconsistent Gaps
Mistake: Eyeballing spacing
Reality: Looks sloppy
Fix: Use spacers consistently
Options:
• Nickels = 1/8″ gap
• No gap = tight fit
Not Sealing Knots
Mistake: Painting over knots
Reality: Bleed through
Fix: Shellac primer first
Pine especially:
• Knots always bleed
• 2 coats primer minimum
Overdoing It
Mistake: Shiplap everywhere
Reality: Dated quickly
Fix: One accent wall max
Already passé:
• Full room shiplap
• White everything
Smart Cost-Saving Strategies
Get the shiplap look for less
DIY Plywood Shiplap
Rip plywood into 6-8″ strips. Sand, prime, paint. Costs $0.50/sq ft vs $2-3. Looks identical when painted. Perfect for accent walls.
Pre-Paint Everything
Paint/stain boards before installing. Just touch up nail holes after. Saves 50% painting time. Much cleaner finish. No tape needed.
One Accent Wall Only
Single statement wall 80% of impact for 25% cost. Behind bed or TV perfect. Avoids overwhelming space. Easier future updates.
Skip the Gaps
Tight-fit installation faster, easier. No spacers needed. Uses less material. Modern clean look. Saves 20% on labor.
Buy Direct from Mill
Lumber mills sell shiplap 40% cheaper than big box stores. Buy in bulk. Often better quality. Check local sawmills first.
Strategic Placement
Focus on high-impact areas: entry wall, dining room, powder room. Skip bedrooms. Maximum wow for minimum cost.
Frequently Asked Questions
Expert answers to common shiplap questions
🏠 Ready to Install Trendy Shiplap?
Find qualified carpenters for professional shiplap installation
Knowledge Quiz: Shiplap Installation Cost Guide
Open Quiz
5 quick questions - see how much you learned!
1) What is the typical installed cost range for pine shiplap?
Answer: B
The guide lists pine shiplap at $3–$5 per sq ft installed.
2) Which material should you NOT use for shiplap in bathrooms due to moisture failure risk?
Answer: C
MDF is moisture sensitive and will swell/fail in bathrooms.
3) What is the most important rule when starting a shiplap wall?
Answer: A
If the first board is off, every row above it will stay off and the whole wall looks crooked.
4) What spacing method creates a traditional shiplap “nickel gap” look?
Answer: D
Traditional shiplap commonly uses a consistent 1/8″ gap—nickels are an easy spacer trick.
5) How much extra material should you typically buy for a standard horizontal shiplap wall?
Answer: B
Standard installs usually need ~10% extra for cuts, defects, and layout waste (more for diagonal/patterns).
🏠 More Wall & Ceiling Project Guides
Explore our complete wall & ceiling renovation cost guide library
View All Wall & Ceiling Guides (20) ▼
🔨 Basic Wall & Ceiling Work
🎨 Decorative Trim & Moldings
🏠 Specialty Wall Features
Last updated: Jan 2026
Sources: National Association of Home Builders, HGTV Magazine, Fixer Upper Contractors Network, Builds and Buys Research Team


